Windows Forensics Workshop

Show transcript [en]
uh attendees uh outside the arab world first of all uh thank you all for attending and joining besides amman 2021 uh today is our last activity or a workshop part of the conference that has been a virtual experience uh very very interesting and fruitful uh it gave us a new approach to conferencing compared to the previous besides amman that we had in 2019 uh having this conference community knowledge sharing between globally between different security professionals and students different languages and backgrounds experiences and sectors it's been really um interesting and fruitful and we are so happy that we it was such a successful experience for us and for all the attendees uh we are also very happy that we have the dr ali with
us in this conference to cover a very important aspect related to windows forensics the conference has covered a lot of talks about application security and i think everyone is eager to know more about now forensics because it has its own audience and special um sign group um i can't talk enough about dr ali of course um you all know him and joining us in this session is of great demonstration to his knowledge and background in the area and uh we don't want to talk a lot about this of course the session will be live streamed if you want to share it with anyone on youtube and on facebook um one one comment regarding the forensics image
i know everyone is asking about it and we have faced a lot of issues related to download limitations maybe not only because it's a limitation on the of the request but also because there is a huge demand on the downloads so we will handle this um either during the session or after the session to provide it to all attendees and registrants other than that we will now enjoy these two hours with dr ali please this is an interactive session or if you have any questions you can just send it in the questions box we will um have breaks every now and then and we can carry on the workshop as you guys feel and dr ali
actually mandates uh dr ali thank you again for joining us it's really a pleasure please the mic is all yours okay first of all thank you uh besides ahmad for uh and the team leila rami muhammad yard and everyone else for inviting me and hosting me it's a pleasure to be here with you today i hope everyone can hear me clear if you have a question please uh leave it in the like i said uh my camera is over here so that's why my the vm i'm using is my camera's on my left and the vm is on my right so don't get confused if you have any question please leave it i'll i'll try to
leave some time at the end so we can go over your questions and try to answer them just a quick introduction about myself my name is ali hadi i work as a professor at champlain college i also work as a research team lead at the lee center for digital forensics and cyber security and i'm also the the co-founder for my screen now you can see my screen i assume and i'm also the co-founder of cyber5w so today we'll try to go over a case a windows forensic case the idea is to try to learn a little bit about windows forensics by what we call learning by doing so the idea is to learn a little bit about windows
forensics this is definitely not going to cover everything related to windows forensics at the end we usually cover that in a course or a semester or whatever uh so try to go over the most i would say important details related to the case uh how we will work the case different tools most of the tools uh actually are or even more all of them probably just one uh are tools by alex zimmerman big shout out to eric and all the good uh work he does i i also highly recommend you go and support him uh so again the idea is to cover a case learn by doing if you didn't get the chance to download
the files unfortunately i we tried our best to handle that but it seems there's a lot of demand on the on the image so we'll get that figured out after the session uh so after that you have the video which is going to be recorded and you'll have the file so you can go over that so enough about that let's get started if you already downloaded the uh if you already downloaded the vm the vm already includes the the tools the image and a document which has an explanation about what we are going to be covering today so we can uh i can i can open that and talk a little bit about this before i do
that if you got the vm then again the tools are within this uh volume which is the v hdx volume so you can just double click on it it will automatically be mounted i know you might not have the arsenal image mounter in there and that's because this is a i would say i updated this early today morning after eric recommended we use image mount over ftk imager but you can still use ftk imager it's the same thing uh to use so we can start by again just double click on the image edit the the volume it will automatically be mounted so you don't need to really do anything there extract the image mount the urls
to the arsenal image monitor will be provided or you can just google them it's not hard to find and then i would want to open this in a new window so we can have these two separately for interruption but some people say that the resolution is not very clear so if that can be enhanced can i i actually even use a smaller uh monitor for this problem but let's see if this will help yeah
will this be better here hear from the audience is it better no
i mean actually for me it's clear i don't know and it says it's fine from my side all right i think we can go on okay great thank you yeah so let's we got the okay so again uh welcome to the workshop uh this is if you want to by the way how to access the the tools i just wrote that if you want to update eric's tools all you need to do is just in the directory where eric has his tools just uh ctrl shift and then open powershell here and then all you need to do is do the get and this will update the tools i'm not gonna do that for now but you can do
that if you want to get an updated version of the tools again thanks to eric for doing all of that for us now the case we have here in hand this is a little uh overview that let me scroll so we've been given a system uh the system has been used for some illegal activity uh the user has access some confidential uh documents which the user was not supposed to be accessing or was not supposed to use the system has two user accounts i would say that's the that's the reason uh this case was created for in this way just so that i would say to confuse a little bit the analyst and then to also
see how they will approach it because you don't want to follow a rabbit hole and then you might waste your time at the end uh your client the that you will be doing the investigation for is only going to be paying you for a certain amount of hours so it's better to know how to approach this so we have two two users okay we'll see how we will be able to filter that and focus on one user and see which user exactly was the user that we are interested in or the most important user for this case so the system has two users one is called joker and the other one is the ie user
which is the default one that comes with these microsoft vms and you are required to provide answers to all of the questions below now one of the uh notes i usually tell my students is screenshot or it didn't happen sometimes i'll just get like an answer especially if we are learning probably in a report you might not want to add screenshots all the time but if we are if we want to learn if this is about learning and stuff like that then it's good to have a screenshot and also to provide your instructor with proof that you truly did this work so that's why i say screenshot or it didn't happen so we'll need to take
a screenshot for uh what we did now first question is what is the hash value for the given forensic image so let's start by actually mounting our image so we go to arsenal image monitor this one once you double click on it
okay so this is a as you can see it's no license it's a free mode i highly recommend if you do forensics you get a full version so that's okay it needs a driver let the driver be set up well good now we want to mount the disk image so the disk image is already in this location just select that and i want to because we want to sometimes access some certain directories which have maybe some permissions that we won't be able to access so it's good to use the right temporary disk space what this really does is it's not really gonna write uh inside the evidence itself so it's not gonna really modify anything in your evidence
so don't worry about that the evidence will not be tampered it's going to create let's say cash and all the modifications whether you need to let's say bypass some certain privileges etc those will be changed within that cache so it will be stored in that cache so it's all it's only temporary in that cache and it's got not going to be reflected on your uh on your image so i will just specify this specify alternate difference the file location because i i usually save them on my desktop and delete the de-referencing file after unmounting i just like to do that in case i load the image again i don't want to get that error message saying
this was already mounted before so you can do that then okay so again i'm going to store the diff file see it's a diff file on my desktop now we have the image mounted uh you can see it has been mounted to the the f drive letter we can see it's a an image we can see the the users we we mentioned in the case ie user and the uh the joker user see this is one we can say continue now because we are going to modify the permissions but it's going to modify that define so we can see these are the users that we have over here so we can we can do that
and if we expand here we should be able to see uh okay so this is not gonna calculate the what is it so if this is not going to calculate the let's let's do this and i'm going to do it a different different way so let's do this quickly and i'm going to leave it to run because it's going to take some time so if we select the b sides and then this and i'll say verify drive image so let this run so we can get the we can get the hash value so we leave some space for that later okay which user account was is used to access some confidential documents we still don't know the answer to that yet
so even if it's listed as question number two don't get confused that you need to solve those questions in the exact order no you can you can go back and forth uh because at the end probably your client might give you these questions or might give you the uh what they want uh out of their of their investigation of what you will be doing for them not in a really let's say uh chronological order or like in an order that you expect to go and investigate them but you can uh like again jump back between them once you have a clear answer you can just go back and add that answer in there so we need
also to explain proof and i i by the way did this on purpose so i i could have let's say put them in a chronological order but it's also to explain the idea here uh if unless by the way you you do the questionnaire with your client and then you gather those questions that you need to answer then probably after you get those you will list them in the way you will you will do the investigation but if these were just given to you which in in our case it is uh don't worry about that we can just again go back and forth between them so explaining details we don't have any details yet so we need to
start working on this did the user access any confidential again this is still not clear to us what prove we still have no idea so as you can see we have no idea of first which user access these files we don't have any proof yet to let's say give answers or put those answers out there so what we will do is first thing we need to know what type of data are we interested in so here it's clear we are talking about user access for some documents so we are interested in accessing interested in artifacts related to user activity that's number one and those user activity is related to if we let's say narrow our focus down again
more it's about accessing documents so it's clear that we want to prove that the user has opened a certain document which is still not clear to us which documents have been opened so we need to focus on the artifacts that will give the answers about uh about documents let's say so one of the uh we have i would say two yes for interruptions but we have tons of questions and about any of the environments yet people are asking about the image the vm password number one uh number two they are asking a lot about the difference between any the links between the different links here when you said that you added the zimmerman tools what's the difference
between the two folders that has been shared um they're worried that this is intentional or some additional clues in the new image also in the new files that's a trick also um again just to clarify the tools i think people are not all of them very much [Music] some of them are new this is their first the forensics uh session so i think if we can just give us a little bit of a sample introduction for everything the tools that we are using some just small words on all of this stuff i think it will get everyone uh well will will into us here anyone with us they're asking about them the mount tool name
also okay so the tool which i used to mount uh the tool i used to mount the image is uh arsenal image mounted and we can get that from let me open my browser here and we can get that from arsenal image hunter from here and if you go to
you go to sync downloads you should find yeah this is the one this is the one i'm using it's the exact same version i i just downloaded it actually earlier today so this is the same one i will actually add the links to all of the tools uh even alex tools even though by the way if you just type eric zimmerman and google it will show up eric's very known for his tools and i i doubt there is a investigators out there that don't use them so if you just type eric zimmerman tools you'll get that but i will add those to this document and upload that again that's one the files that were shared on mega
those only include the e01 which is the this image this case image and this document here it does not include the tools the vhtx tools just the image but i can upload that again after we finish the session and this vmware by the way i also downloaded it from microsoft so it's really not a special virtual machine there's nothing special about it you can just call windows 10 vm download and then you can get them from here
just select the hypervisor you use so select the windows 10 and then select whatever hypervisor you use i'm using vmware so that's what i did and i downloaded that i got these links by the way to all of that there's nothing really different between what i'm covering now and what was shared again the only difference is currently i only shared the e01 because it's fast and the this text file because the the whole vm with everything inside it i think it's 20 plus gigabytes so i i thought that if you you won't have you won't have time to download all of that within the time from when i woke up got these uploaded uh again
until our session but i i will upload them again so don't worry about that and the password by the way this is the the default password that microsoft use this is not the password that i use it's also by the way you can find it here so again because i'm not using anything special here so you can find it over here uh everything else really is the basic vm with those tools i'll i'll put a list later for everyone with uh details from with urls and details from where can uh where where they can get them does that answer all these questions or is there anything else no that's that's it there's a question about life forensics
tool but maybe we'll cover that later on okay yeah i'll uh we can we can add i'll try to finish as fast as possible not as fast that you don't learn anything but i mean uh give some time for questions and uh you can feel free to reach out to me after the session also probably will add more to this later uh but yeah i'll try also by the way the tools each tool i'll use i'll try to explain what that is give it at least an overview the idea was to explain the tool while we use it so arsenal image mounted from the name it's just to mount that e01 which is the forensic image
which has a copy of the disk we are investigating so what this tool will do is it's gonna mount the image and have it appear on your computer as if it's another volume on your computer so if you go by the way to this pc you'll see that we have another drive or another volume uh connected to your to your system it's actually another the it's actually the the uh the image which we are investigating so that's what uh arsenal image monitor does ftk imager is another tool which does the same thing and it also can be used it's actually mostly used for acquisition plus mounting we can use that but again there are some
i would say lack of support for some features so we recommend uh based on also uh eric's recommendations and others to use arsenal image monitor as you can see here by the way these are the hash values computed of the image now this is the hash value of your image as you can see here the computed hash with what is stored they are com they match so that means the the image has not been tempered we don't have any same thing so whether it's md5 or sha-1 you can see they were both be they were both calculated and they are both they both match so that means the evidence has not been tampered which is what we want
there's no bad sectors or no bad blocks in this image so that's why you see nothing over here you can copy this to your uh answer so you can say maybe md5 and this is the answer for md5 or sha one and put the answer for what you got for uh sha one uh now one thing i do like to explain here about the e01 probably it's better to explain it a little bit using paint i'm not good at drawing so please excuse me if you see my dong is not the best but think of the image like this this is the image okay this is the e01 and inside your e01 we have two things right this is just trying to
explain the idea behind the concept behind this okay so this is the image the e01 the whole file and within the file we have the drive which we are imaging which is image sorry that we are investigating which is now uh this one the f drive okay so this is the drive this one is inside here so if i just add some details here let's say this is the f drive maybe i increase the font a little bit okay and so this is the f drive here and when ftk was telling you that this is the computed hash and this is the stored verification hash what does that mean it means this hash value uh
was actually stored in a metadata section so this section over here by the way i'm gonna try uh do it this way so this is made this is the metadata over here which is the metadata about this forensic image and what this metadata includes actually is or one of them one of the things that it includes is these hash values these hash values are actually stored within this metadata section so what happens is when you use ftk imager or any other tool okay what happens is it will go and hash the volume again okay it will hash the volume again and then it will compare it with the hash value within this metadata section okay and if
they match it will tell you they match this is totally by the way different than you going and saying i'm gonna hash the whole file and let's just change that over here with with this green color over here so if you hash let's say you take the whole file the e01 file and you hash it like this you will get something completely different but if you like open it within a tool which understands e01 and it can compute the hash value for you compare it with it which with what is stored in here and that's actually what we need if they match then our data has not been tampered this is very important because i see all of the
all the time even i would say uh our freshmen when they start they will when i tell them give me the hash value some of them might just go and hash the whole e01 uh image so that's one we uh we've got that done let's go move on to the other parts so the other parts again we said we don't know who accessed those files yet we have two users so we are confused which one of those access the files but we are talking about documents so there are certain artifacts which the which i would say track documents now microsoft when they created these uh these tracking features they didn't really create them for investigators to
come and use them for investigations they created them for user experience so they created them so the user can later on uh if they are if they frequently open a file or if they just recently opened an application and they want to open it again or if they open the file and they want to open it again they can easily go back and find that file or find that application and open it again so these are features microsoft did not add them for investigators but we are taking advantage of them so one of them is if you like right click over here which is called jump list so we can see jump lists actually are these
type of lists which show you what are the files that have been uh recently opened or frequently opened or sometimes you can even pin them if this is a user might pin this document especially if this document is what they normally use um every time they use their system so they might even pin them these are all details that we can use to our advantage and what this means is if a user opened let's say a document then probably we can find it in that in that jump list okay so we can parse that that's one two another user artifact related to jump to documents and uh those this type of thing is when you open a
document again for user experience microsoft will create a shortcut which is what they call an lnk file so if we if we let's say parse the details of the lnk files and the jump list we might find an idea of those artifacts which have been uh have been open or those documents which have been opened by by that user now since we have two users here uh i'm gonna use a little bit different because i want to copy i would say or i want to make sure my tool can pull both of these tools okay there are many ways to do these things i'm going to do it just one way it's probably an easy way maybe someone
has a better way of doing this so i'm gonna pull the two artifacts related to let's say the jump list and the lnk files of both users and then focus on them using different tools which have been created by alex zimmerman so let's put these minimize them and if we go to our tools our examiners tools and then i already have my powershell open i'm gonna use them as administrator and let me do this i will okay so uh first thing is let's pass let's say uh not sure if this one can be minimized let's just leave it how it is so first thing is let's parse let's say the lnk files so there's a tool called
le cmt okay now if you by the way just type le cmd and just hit enter this is also one of the great things about eric's tools is first they have a lot of documentation showing you how to use the tool so really it's very easy just type the tool name like that you'll see the help uh on how to use it that's one two learning how to use one tool and all those options by the way they are the same use across all of these tools so it's really uh very easy to memorize even if i can say it that way because you don't have to keep trying to memorize different options for different tools and
this which gives me this uh feature this one gives me that no they are all using the same thing so once you i would say once you use one and you know how to use it you can use that for all of the other tools so one first thing is uh we can use the uh le cmd to grab those uh le cmd files lnk files excuse me that's one uh two if you want to parse a directory so let's say we want to pass the whole directory of links you can use the the d option or the d switch if you want to pass just a single file you can just use the f switch and then if you want to
let's say convert them to a csv your output into a csv you can use the csv that's what i'm going to do and again these are all the uh let's say the different examples that you can use so it's really straightforward you don't really need any kind of i would say explanation for that except you need to know where the uh the artifacts is located so let's go there i'm gonna close this for now so if we go to users let me go to view options and make sure i'm not sure if on your vm i might have forgotten to do this so make sure you uh show everything so go to head go to view maybe i do this again go to
view uh options and then go to view again and then show hidden files folders directories or drives uh hide empty drives i'm gonna list everything unhide all of them and hide protected operating system the files i'm also going to uncheck this so that way we can find we can list everything so everything is now hidden let's say if we go for example to you i user we just take that one first and then we are interested in let's say lnk so lnk is located in application data roaming microsoft and then windows and then recent items or actually it is recent if we go there you will find those uh lnk files but why are we seeing them empty here is because
this is this directory has a specific geo id and let's say it has a spec specific feature which is to show or to store these recent items so the the explorer shell will not allow you to see what's inside them because the explorer shell understands them differently than what we are trying to look at them in a different way so what we can do here is do recent okay and if we do that let me just clear this again probably and run the command again so if we do this you can see that within that directory we have two other directories one is automatic destinations the other is custom destinations those are two directories we can see that from
the attributes over here and then we can see these are the different lnk files we have uh over here okay so that's for the ie user we can check the uh the other user which is joker we can see same thing we have this directory and the other directory custom and automatic these are by the way the directories where our jump lists are located so the jump the lnk files are located in the let's say the drive letter users username application data roaming microsoft windows and then recent okay and the the jump list are located within automatic destinations which are the jump lists which get created by automatically by the application and customer those that get created by
let's say the user themselves okay so what do we need to do with this let's use now the tool again so what i'm gonna do is if i use by the way just one uh let's say one file so if i do this and then recent and it's firing maybe like just this one if i run the command against this file so it will it will go past all of this and give me a lot of output all of these outputs by the way all of the this details that you are seeing here is stored within this lk file okay and le cmd or eric's tool is going into this file which is a binary
file by the way it has a certain structure all of the structure if you want to understand that or go into more details about this by the way also eric has a lot of links to them or you can just by the way search for lnk file format you will land on the page for for that and i think it's uh if i remember i forgot the name but it's done by one of the folks working at uh google and i think he wrote a lot of these uh file formats he's the one that's writing a lot of these file formats so eric goes passes all of that but this is for us one single file
if we want to pass again the whole directory so what we will be doing is i'm going to change this to d so that way we'll pass the whole directory that's number one i'm gonna call i'm gonna store it in a csv file so i'm going to use minus minus csv f to give it a uh let's say a name and i'm going to say lnk or you can let's actually create a directory on our desktop so we can this way store our results in there i know the tool will create that so let's just do this eric's tool by the way we'll do that if you do the location is not already there and let's
say uh this is the ie user lnk dot csv file that's what i'm going to call it maybe so you can see this let me do it this way okay and then the location where i'm going to store this is on my vm's desktop results that's where i'm going to store this so what this will do it's going to go over uh and i forgot to put the minus minus csv okay so now what this is it's by the way it's because i minimized the or i would say change the screen resolution this is what's happening i hope you can you are able to see what's being done so what i'm doing is i'm specifying the
path where the evidence is located telling it i want to pass the whole directory i want the results to be stored in this file okay i want you to put this file as a csv file in this directory so if we hit now enter the tool will go uh parse all of that and you can see now it's stored in this file so that's one let's change this let's change this to our other user so we now will change this to joker and say this is our joker user okay same location but the user is different now okay what did i do here oh good and then we want it in the same location we can do that
so now we are storing these uh csv files in let's bring this over here in this directory we can see we have the files over here that's one let's go to the tools again because eric also again like i said you can run really the whole windows forensics session here just using eric's tools you really don't need anything else uh but sometimes it's good to see other tools maybe that's up to you especially if you are learning and also probably if you are validating even though i would say uh even in times where bugs were found uh if you just send them to eric he will respond immediately or like in minutes i've i've seen that over
the years and he'll respond back and fix that or he will ask you for a data set or a sample to do the test and get that fixed so here we can see that now we have the lnk files for this user and we have the lnk files for the other user so you can see these are listed in a tool called timeline explorer now what this timeline explorer is in the past i would say at least for my i speak up for myself uh we mostly tend to use uh an excel sheet to open these csv files and pass them and do filtering and searching in them that could all be done today with
timeline explorer so you really don't need excel so if you even don't have a license for microsoft excel you don't need that this is far better in my opinion than that and i will i'm not sure i will be able to uh let's say show all of or showcase all of the features of it because we don't have time for all of that but i have a question so is this timeline is this the big timeline or not yet no no this is not that uh not not the the super timeline if that's what you're talking about yes yes yes okay so we're still in this phase because why yeah go ahead leila because people are still following up so we are
now in which stage in the uh investigation still pulling out some data related to document activity or user activity related to documents a general step just looking what has been going in terms of files right activities by the two users exactly yeah okay so yeah the super timeline or big timeline yes i know yeah they i haven't done that yet okay good can i continue uh yes if you want me i have two questions maybe they will uh they will add they will enrich the discussion we have so many questions so just to uh so is there any better approach for uh considering because this image has more than one pro more than one user profile is there a
better approach to compare or to look at the different activities or to compare between different users or this is you mean by pulling the data out and looking at them i think so this is the question by emmy uh her question is is there any better approach if that's a server image because a server image would have more users i think uh again then that's the funny thing is you can also use eric has another tool called cape and you can you can i would say configure cape to go pull the artifact the exact artifacts that you need from every single uh every single user and every single location that you're interested in this approach is more of a let's say an
educational one so that's what that's uh we go past each one but if if you're uh if you wanna if you know what you're doing and you you want to speed things up then i would say go use cape uh and pull all the artifacts that you need and then just focus on them okay i hope your questions on okay we'll see if amy wants to add more we have two questions on uh the link file the first one is the dot link file has any way is has any is an in any way related to software link as we say in linux this is number one uh number two what does mac address and
linux files mean what if computer have two networks cards [Music] can you repeat that again please i might have updated one okay the first question is uh the file this thing the link file uh is in any way related to the soft hard link as we say in linux yeah it is it's not a hard link it's a soft link okay this is number one number two what does mac address and rank files mean what if computer have two network cards uh i would say it will depend on which probably they will both both be listed there i haven't seen that honestly so i'm not sure if uh if they will be both listed what they might be or the one that i
would say the main mac address could be listed i'll need to see a case with with that there so i can i can validate that or provide a i would say an accurate quest an answer to that i have a question actually i it's been a while since i worked on this the mtf the master table file we can see that information from the from the timeline explorer on the files that one has been created modified etc or do we need to take into anything into consideration when we look at the time and dates uh you mean you mean the lnk files yes excuse me do you mean the lnk files themselves yes okay yeah you can definitely
find them in the mft you can find them over there or you can just find them in in the artifact itself it's really up to you uh i would say file system forensics is a little bit uh not that easy people try to avoid and you you if you probably ask a lot of investigators and not many really dive i don't know there is no like a survey that says how many people uh dive into that much of details how many not it will depend on really the case you have uh but it's a it's a complicated more much more complicated than looking at the artifacts on the os layer because the more you dig deeper to reach the
disk layer so the more you reach the disk layer the more i would say it's going to be more complicated we are here looking at the artifacts on the operating system layer which is much easier for us as humans the more you go down that path uh like from os to the file system from the file system to the volume from the volume to the disk etc the more it will be more complicated but that doesn't mean that you can't do it it just means to require more time probably depending thank you sorry for the interruption but i think now we answered the questions we have okay uh let me try to by the way uh
continue try to answer as much questions i know i know but the questions are accumulating so you just got to this people are still asking about the vm image the links so all of these details will be shared after the session and uh yeah we pointed that out at the beginning of the session but for the people who joined in late uh these details will be shared after the uh decision so please follow follow up on the instructions follow follow doctor and you can practice you by yourself after the session uh one one word also about the resolution and if you can increase the phone if anyone is facing any issue please follow us on the
in the live stream maybe it's it's better there so thank you yeah doctor uh i just just so i be honest and clear with everyone attending here i have another appointment immediately after our session so i will leave once i get back home i will find a way to upload all the material for everyone who is attending or who was not able to attend so i will get that done but i won't get that done immediately after the session okay so just don't worry please i will just share everything i do later on okay so what i'm going to do here is actually just combine those two uh actually we have two length files now
as you saw here in uh two csv files this one and this one and i just want to combine them so we can look at them as one single csv uh so i found this way we can do it this way i will share also the the let's say the the way this is being done uh the command in the in the document because it wasn't really in the document i also found the script to do another thing which i will also be sharing all of this will be shared again so whoever's following don't worry about that okay so what i want to do here is i want to combine those two csv files into one file uh so that way
i can load them as one file in timeline explorer i know you might be saying why don't i just do copy and use the binary switch etc the the only reason uh i'm using this is each csv will have the header with uh the uh with the table entries for each one of them so this way i can do it without worrying about about that problem okay so what i'm going to do now is just combine these into one single file say call it users underscore lnk dot csv
[Music]
so why is this oh okay there's a okay we have now one uh one csv file as you can see here even the size is twice the size so now what we can do is load that one so if we go to open desktop results and open the users one so we don't need these anymore i'm going to close them i can now look at these uh by the way they all by their own you can see that these are ie users and these are from the joker uh one you can even by the way like even click on them and do some conditional highlighting so you can just say text contains maybe it's really up to you this is just some
of the features that you can add let's call this green apply that so this way these are green and these are in some other format it's up to you really how you want to do this so if we look at these and we want to see which user was accessing some documents here so if we go to uh we go to the file or the local path so you can see here a common path we can see here these are some documents which have been accessed these are on on the other side our other user so we can see the user in the user in gray which is the ie user now has opened images while the user in green has
opened confidential documents so we have now one proof by the way that the user joker that's the user okay that has opened these files okay and again we can see that in in in this location over here in the common path you can see that and by the way if you if there's let's say if this entry you're not interested in it you can just say hide that so this way you can hide this hide this column you can just hide it if you're not interested in it if you want to group your column so for example i know there's a question later on in the document saying were the files accessed from local drive
or from a remote drive or a remote chair so we can see the device type again we can see if it's a fixed storage or if it's something different we can just right click and say group by this so now what happened is if we go back here we can see based on the drive type we can see that these are the drive these are the the documents or everything that was opened from a remote network or over the network so if we go over here you can see these were open from a remote location or from another location while these are all open from a local location okay and again uh which user these are
the ones in green so it's clear we are now dealing with uh the user uh user joker okay so that's that's uh answer to uh part number one uh so that's one artifact which gives us idea of which which user opens which kind of documents we will go over others uh let's go use another tool uh let me open this one another because i don't want to keep jumping back and forth and if we go to okay so this time what we want to do is i want to open uh the lnk files so the lnk files are those shortcuts we want to open those and see what kind of details do we have inside them so we can use the tool
called uh actually we did the lnk files uh we let's do the jump list sorry we already did that in case let's use jump list okay so we can we can do by the way a jump list explorer or you can use the jump list the jump list explorer the cmd one so if you want to run them from the command line you can use this but if you want to let's say open uh open them in jump list explorer which i want to just show you a different way not everything is eric has i would say the core of the tools and then he builds either a command line interface or a gui interface around his
tools so this is one of the other tools that we can use if we go and try to load again the f and go to users go to let's say i user application data roaming and then go to microsoft go to windows and then if you try to go here to see we can't see even the the recent directory even if you try you won't be able to see that you can't see them over here so the way to work around this is i found the script that i will upload to the i will upload to also the share drive okay or wherever i'm going to share this data create [Music] jls or lnk for jump lists that's what i'm going to
call it and then if i just copy i'm just also going to by the way copy where this was got from so if you go to stack overflow this is actually from where i got this script it's really not mine it will create a symbolic link for as you can see here let me maximize this a little bit so it's gonna let me just put these over here so you can see them i'm gonna create symbolic link for first the user joker roaming microsoft windows recent automatic destinations that's where our first our first jump lists are located and then the custom destinations that's also where our jump list is also located i want to put them all as lnk files or
assembling things okay so it's really just a wrapper around the make link so if you know how to script make link do that if you don't this is one other way of doing that and then i'm gonna store the results on my c users i desktop uh let's put this in the results directory so this is gonna be over here okay and since we are interested in two users not just one okay we are interested in uh two users so i'm going to also change this to the ie user right because we want to pull both of these users and by the way one of the questions which one of you asked earlier was how can i like automate this or if i
have a server with multiple users i would say use cape cape has lots of ways to configure this like you don't really need to type in the user you'll just use the uh the variable for the users and then it will go and then it will pass all of those for you for each single location and actually most of them is really just clicks if you use the gui tool as well so this is one way of doing this but it's really up to you now i'm gonna why did i even save it as the txt i'm gonna save it as ps1 yep and now let's go to so jump list explorer okay and we want to run
our create symbolic links so it's gonna create the links okay uh forget about the uh saying that the file is already exist it's talking about by the way the the directory which we created now within the results this directory it's telling you that it already exists so what this did is it created lnk files pointing to those jump lists and now what i can do is i can just go grab all of them uh from uh from that directory so i can just say do this and i these might have some errors in them so that's why they cannot be passed and this way now i can grab all of them whether for the joker user or the other
user ie user and have them all in front of me as you can see here we have this quick access we have notepad these are uh some of the applications if the id is already known uh because each application has uh a unique identifier which eric also attracts and i think a lot of other people also track you can find them online if the tool knows what type of application you are dealing with then the application id will appear the application name sorry will appear over here so you'll know that i'm dealing with notepad and this is a jump list for notepad which i mean this is notepad i'm sure everyone knows that so if this is a jump list for
notepad by the way then it's going to be over here if it's for edge this is what edge uh the the jump list for edge are etc okay you can see also each one of them is showing you how many links are within those jump lists because those jump lists you can look at them as they are they it's a let's say it's a big file with a lot of other links within them pointing to other locations so it's telling you also how many links you have within those locations now in here for example we can see word wordpad and we can see this is for the user joker okay we can see that this user accessed
all these confidential documents so we have actually now two evidence that the user joker accessed these confidential documents one was on from his computer or her computer or whatever and one or the others were from a network share which is the 192 168 70 128 so we can see all of these files now also if you look at these probably if you look at the timestamps by the way for them you can infer from them that probably this file was first accessed and then copied to the joker system and then the the user opened them on their system so we can by the way just by looking at the timestamps okay we can infer that this is probably
uh they are the same file and this file was first located on the network and then it was uh copied to the drive or to the user's drive and access from there and again this is how you'll find uh these jump lists uh if you look at any one of them for example maybe if you look at putty you can see uh what is the path or what what location maybe put he was accessing so you can see that putty was accessed from this location and so on and so forth so even like here this browser this image sorry so you can see here that the user joker also accessed the document called haha.png this case by the way was created by
myself uh so we can see all of these details uh in here which prove when was uh which user was accessing this that's one and then from where was this uh also uh file accessed okay uh let's continue so these are uh different details you can see here by the way for each entry these are all different features available within those jump lists or link files which again eric's tools parse automatically and provide them to you so it's telling you when was this file created when was this file last modified these are all being by the way extracted from this uh from this jump list all of these data flags each one of them means something
by the way each one of them will mean if there's a list if there's a let's say more paths to go dig deeper and uh parse them all of these are details uh eric's tool automatically will pass them for you uh you can see the file size icons uh showing show a window so when you open this application whether this window will like automatically expand or it will be minimized these are all listed over here the absolute path the local path all of these locat uh details are available now they will be different by the way depending on the type of file we are dealing with and the type of details available uh to you so now we have two the the uh
two evidence so if you were to let's say put some let's say screenshot into your report for example i do prefer to use a tool which is called i keep forgetting the name snip and sketch because uh based on the recommendation from my son actually it will give you better i would say the resolution is better and you can like for example here you can then uh highlight on them you can say uh highlight this and stuff like that so you can you can add the highlights you want and like even if you and you can the good thing also about this by the way you can use multiple colors you can expand i'll leave that to you to
check that out but but again you can use this and then copy this into your into your report so if we want to answer the first this is joker we have proof we have this proof number one but we definitely can add the lnk proof we didn't add that and you can do that later just because i want to be thoughtful of the time and i i'm trying to cover as much as i can in this session so we have two two artifacts which gave us answers about that but still we can we can get more so let's go dig into uh providing uh more let's say uh results for more artifacts and more details
let's use another tool called registry explorer now since we know which user we are dealing with we can just dive into that user pull the data we are interested in and focus on on focus on that now all of i would say all of the users preferences configuration uh the changes that the user does on the user level are mostly i would say 99 i don't want to say 100 just because i might be wrong and 99 they will be stored in a registry file within the user's home directory called nt user dot dot so if we go and say we want to load that data that file so if we go to users and then now we are we know which user
we are interested in so if we go to joker and then we get this end user the dot file and open it again eric automatically will pass this registry hive for you with all of the details inside this is by the way if you open for example let me just give you an idea what this is so if we open edit editor and if we go for example to a specific user so let's say we are dealing with this user okay and then this is the details by the way if you can see here this is the details that will be available to you underneath what elic has automatically uh parsed for you uh okay so this is
uh the details that will be eric will uh this is again this is stored by the way in that end user.that file but for the running system for sure not the the joker user but just for the idea okay and all of the entries that you see in here they are the same ones that have been passed automatically for you you can use now eric's tool to dig into them and analyze them so they are just giving you a map now you might say what about this this is volatile so it will not be available once you turn off your system so that's one about how good this tool is too most of the tools
most of these hives have a lot of bookmarks and you can also by the way you can also by the way create your own bookmarks so if let's say you find some interesting artifact and you want to bookmark that and let's say you're working with a team you can then share that with your team but by coincidence by the way i'm not sure how my mouse pointed to this but anyway we can see that these are by the way all different bookmarks these bookmarks will take you directly to locations where let's say you if you are looking for details about cd-rom burning if you just click on that it will take you there if you are looking about
let's say recent documents which we are looking uh for an information about that just by clicking on it it will take you there now that's one two lots of the lots of these bookmarks or lots of uh the tool what it does it has a lot of by the way plugins built in them so these by the way the results you can see over here i know uh this one is uh i can't minimize this or oh i can move it around okay let's put this down here and okay so you can see now better so by just clicking on recent documents by the way you can see all of these results but these results really
are being passed by a plugin he has a plugin which automatically goes into each one of these sub keys so there's a sub key for documents there's a sub key for pdfs png rtf and folders so you can see these recent docs this windows registry windows registry location or key is actually tracking all of those documents and it's also categorizing them based on the type of document we are dealing with so doc x we can see those uh pdf png rtf etc so we also just by looking in in here we can see the files that have been accessed so we can see the file or the the target file which is what the file
uh this link or this entry is pointing to so we can see that this is the the file and this also gives us another proof that these confidential documents were accessed by this user if you would say i don't want to look at the plugin you can you know just go by each uh each recent document and then looking inside each key so if we go to document x we can see them and we can see even each one of them has a value because these are part of what is called a most recently used list mru's and they are being passed and displayed to you in that order uh and as you can see here
even this is another thing about them are used by the way uh you can see here that and number two was let's say uh probably the last one uh created but it was the last the one that's in the uh in this opened it's the last one that was opened so that's why the id you can see it was zero uh over here and you can see these lnks or these entries actually will track the last one which was open so we can see actually that confidential zero four was the last one opened and when we talk about document x files and this is the date when it was open and this is when i
created this uh this case sorry there are a few questions relevant to this maybe we need just a post for some some of these quick questions uh they are relevant to the time zone if the tool if we can capture the time zone and if the modification and creation gate can be tampered with so i don't know how if we can take these questions quickly and if we can also get these details with the ftk imager okay so timezone timezone you can either if let's say whoever gives you the image tells you about that that's good if if it's not given to you then what we can do is we can go to windows system 32
and then go to config let's open this and [Music] okay and then go select system so let me open that and show you a little bit about the time time zone and then if we go to select the hive which is the system again there is also a bookmark for it and if we go to time zone information you can go over here and you can see uh the time zone which was being used over here so we can see here by the way it's using the pst times on so the pst time zone is the one that is actually being used that's one two to make sure you understand uh let's say whether uh daylight saving is active or not how
you can interpret this is look at the the bias value which is 480 and look at the active time bias is also 480 and we have the daylight bias which is -60 now if daylight saving was active by the way then we will see the active time bias will be 420 because we need to subtract that from 480 and that means we have uh my utc minus seven instead of minus eight this is what uh this is what this this is how you can interpret that this is one two these information by the way is being pulled from the t z uh our tz-res the tll file which if you go to the uh if you if let's say when you reference
the minus 12 minus 211 or minus 2 12 if you just by the way search for this online say timezone and put tz uh res which is i think it stands for timezone resolution dot dll then you'll see that the minus 211 stands for the pdt which is when daylight saving in pacific daylight saving is active and if you go to -12 212 i mean that's when it means to pacific standard time so that's how you can get the hands-on information about that otherwise it might be given to you yeah thank you doctor that's a couple is about how we can make sure that the creation date or modification rate of the files are not tampered
with well you will need to uh that's uh i would say you'll need to probably you mean the time zone is not tampered or the file itself those are two different things by the way and the file is a small element of the files with the modification dates and so that means now we are digging into again we are uh moving away from the os layer going down to the file system layer and that means we need to since we are talking about ntfs then ntfs has actually uh uh for each file a two set of attributes and each attribute we can compare them uh if those time zones were modified you can uh notice that
also you can use the uh the log file for ntfs because it's a journal file so you can use the attributes with the log file and find if there is any uh modifications in there now it's not that much it's easy said than done but just to answer that question currently thank you one last questions about ftk imager can we do the same job on get the same details with ftk image such as uh let's say the time the jump list timeline explorer i i wouldn't use by the way ftk imager to parse files because even though it does have a hex editor it's i wouldn't say even it's a really x editor but you can it's a hexa
viewer so for example if we go to users and let's go to joker for example if you select decode this let's say executable you can see it's uh listing them as in hex below because we can say listed in hexaview or in whatever view if it's if it's a text file for example or an image we can say list that so we can we can have uh ftk listed in its own natural viewer but uh like an exe we can't do that because it will need to be executed so you can do this that's one two you can also for example use the hex interpreter so you can for example like select some values and
get them interpreted over here if these are times then they will be automatic so as long as you know uh let's say where exactly uh the where exactly those bytes which represent the timestamp are located you can definitely do what uh jump list or any uh le cmd all of those tools are doing uh but that's a good thing about those tools they do them automatically uh for you you can do this but again it's not not an ideal way of looking at them you can also for example look at once you select a file you can look at these properties those are also different features some of them like here is telling you what is the mft
record if you are interested about file system related data it's telling you whether it's resident uh which means whether it's stored within the mft or it's stored outside the mft a lot of really different uh details but these are all gonna go dive into i would say uh file system uh file system layer which is very advanced or it's i would say will require more work than just to go click and do a couple of things easily like what we are doing now and again i don't recommend uh using ftk for this type of work you can use it just for the sake of let's say testing or just to see something quickly or checks but
i would recommend using uh the best tool for the best to get the job done
great so we have uh now we found in the windows registry uh again we found in the windows registry uh proof that the files were accessed we found lmk files proved that the files were accessed we found jump lists that the approved the file were accessed we can also prove that let's say the user if we want to maybe add more uh use that certain executable so what we can do is use another tool so where is okay so we can do pars which is p prefetch files so we're going to use p c and d and i can i will use another tool just so that again you can look at different tools and use them i
i do recommend direct tools because of the accuracy of them the updates the new features he adds all the time but it's really up to you what tool you use uh i always even tell my students it's not really about the tool it's about understanding where those are artifacts are locating located and knowing how to extract them past them and use them to your advantage definitely the good tool will make your job much easier but that's up to you uh which tool you use so let's create another csv file i'm gonna call them prefetch dot csv okay minus minus csv and i'm gonna also store them on my users ie desktop results and we can parse all of those and then
load them while this is being passed by the way let's use another tool just like i said so you don't don't say i'm just using these there are other tools like one prefetchy viewer i do recall it has some bugs but let's just give it a try so this is a gui currently what it's by the way loading just in case this is loading the prefetch files on the running machine so what you need to do is you need to change it to your uh uh the the path where your image is located so powers is on the f so you can just say f and leave everything as it is it's gonna automatically also pass them
for you uh it's gonna list by the way in local time so if you want to switch to utc or gmt just go here and then you'll switch between local time and gmt so here one of the things that we saw is if we go back to our uh let's just pick this in the user and then go recent dots okay so one of the things is we we noticed that we opened uh these documents were rtf so they were using the uh the word document the windward excuse me and we also saw that by the way in windward so we saw it in the jump list that the wind world was opened so let's see
uh that in prefetch files and now you might be asking what a prefetch file is again these are not things that microsoft is using to track you as a user even though they are they technically are but they are for user experience the idea behind i would say uh briefly what prefetch file is once you load an application sometimes that application requires a lot of setup requires a lot of files calling i need this that i need this library i need this library uh go fetch me this file etc and there's a lot of let's say behind the scene a lot of setup the system needs to prepare for this application in order to get it
ready for the user so these prefetch files what what happens is the system is automatically there's a service running in the background it's monitoring your uh your execution so when you when you first time let's say uh double click on an application or you run an application what will happen is the this service which is running in the background will is monitoring what's happening within those couple of seconds six seconds etc and then it's gonna save those in a file which is called the prefix file so we can use that prefetch file as proof that this executable was actually executed now one thing to keep in mind about prefetch files is they are uh across the whole system
they are not for a single user not like the jump list what we saw if you remember the jump lists the locations they point to a specific location within the home directory of the user so we know these artifacts are from joker or from ie user etc but this one is pulled from the windows prefetch directory so these are for the whole system so we need to keep that in mind one of the good things is to probably use is use that and track when the user was logged in and try to match was this application executed within the time frame the user has been logged in and also one uh important thing about user login
is at the end by the way you can prove a user has been logged in we can definitely do that but you can't prove that so for example you can't prove that it was me who logged in because someone might have let's say stole my password and used it to log in so you can't uh what i would say you can't put me behind the keyboard and there's a good book about that i highly recommend if you just google it uh you can find it there's a good book about like putting the uh the suspect behind the keyboard i would say go and and find that book because again you will not be putting me behind the behind the keyboard you
are actually proving that this user is the user that actually uh accessed access this uh this uh the user that has been has uh logged into the system okay so that keep keep that in mind okay and uh any questions so i can just
uh yeah we got one no according to you which tool is best for windows linux mac for example that's relevant accord yeah which tool is best for windows linux and mac for forensics purposes i i didn't understand that honestly yeah maybe always maybe you can repeat the question again
cleaner program that cleans up the registry entries uh cc cleaner yes but i don't know that's relevant to our topic again doctor it's so it's it's fine i will just give it my my my my answer to that uh so it will depend on the options you've used at the end though uh the uh you can you can think of the the windows registry as a file system by the way and look at those if i go back here a little bit and you can look at these you can look at the keys as folders and look at the values as files within those keys so when you delete so what ccleaner will do is we'll go and
delete those files so uh all those entries so when you delete those unless they have been white okay then if you are if you know the structure of uh the registry files and how to parse uh how to find them and how to pass them then probably you can carve those registry uh those entries out and analyze them again if i go yeah yeah should i continue yes there are some some questions that are generated a bit so we can leave them till the end so we can move on okay i'll leave these general questions great uh but by the way the book i was mentioning i just uh because a lot i'm trying to focus on
the workshop so i i just forgot the the author's name i apologize to brett the book is authored by brad shavers so if you are interested in that also go check it out and also brett has the dfir.training website which is a really good resource if you want to check for different uh details related to digital forensics and incident response okay so sorry brett i forgot your name just because a lot of things going now inside my head okay so uh we saw that uh again the uh though those rtf documents were accessed so if we check wordpad by the way we can see uh just by clicking on any of this by the way
you can see that it will list all the files that have been accessed by this executable and you can like just filter them or sort them out and you can see that the the the wordpad was actually used to access the user's joker confidential.rtf rtf file so that document lnk proves it was accessed jump list proved it was accessed the registry approved it was accessed and we also now can see that word the word pad also proves it was accessed if we go back because i know by now this has done finished so if i go back to timeline explorer and load the file so if we load prefetch and if we go for example and search for
wordpad.exe you can see it will automatically be listed here and it's as you can see it will also filter them this is a really good thing about eric's tool you can see how the executables name you can see how many times this executable was run the run count it's also available here just for the record it's also saying five not that i didn't uh i just didn't mention this so you can even track how many times this uh executable was executed you can see also when let's say the last time this executable was accessed uh the previous the previous previous uh it will track a couple of times how many uh on windows 10 i think they are eight
if if i'm not wrong and it will then if you go to the end it will show you if you double click on this by the way it will list all of the files that have been accessed by that executable you can either take them out like this i copy them and go to notepad and just paste them here and then dig deeper into them or now since you are interested in this executable what you can do is actually go back to eric's tool again go back and this time instead of doing the d using the f and say uh wordpad okay and then we don't need this anymore we can just dump it over here
the results and you can see also here it will list uh those files that were accessed for you you can also by the way if i just uh let me just remember the keyword uh i think it's minus k exactly so if let's say you know what you're exactly looking for you know the keyword because eric has some built-in keywords especially like tmp etc they will get highlighted for you so you know the exact keyword and let's say we know we want to look for a confidential so if we say let's just do this for example and if we run it now what it will do is it's gonna highlight as you can see here it's gonna highlight
that entry for you same thing by the way but uh what this is doing is it's parsing just one single uh prefetch file is telling you this is the command line that you use these are the keywords like i said these uh temp tmp those are built in uh eric has them built in it's telling you which file has been processed it's telling you when was this file created so the creation time by the way infers when was the first time this executable was executed modification time let's say when the executable was executed next time that's maybe one if there were changes it will be modified and here because it's showing that now we are accessing it so it's telling
us that it's been accessed on july 4th which is today is telling you the executable name the hash value which is a kind of a hash for each executable there's a complex algorithm behind it that gets [Music] gets used to calculate those those executables i would say basically if they are run probably from two different locations they might have two different hash values it's telling you the file size and it's telling you also that this is for windows 10. the wrong count is five it's telling you uh the first or let's say going back from the most recent and then uh going back from there where is it located all of these are and the directories that have been
passed or found within that prefetch file these are all listed over here so that's for those questions if you now like again like i said we can prove that joker was used we have the allen keys here we have the uh the recent documents in the end user. from the windows registry you can answer those was it from a local drive or a network drive we saw that the user accessed both of them the user access some jump list from sorry some files from the network and some files from the local drive so you can add those answers over here what proves to have you have to support your you can just go and explain that to what
i what i have been talking about and now list all files that were accessed here i just want you to like go take those files out and like list them provide two evidence that prove that we actually provided more than two so we are good to go with that which application was used to open any of the confidential documents we saw that uh rtf uh those rtf documents were used uh windward was used to open them so the answer for here is when word when word okay dot exe was used to open that the next three questions are related to the image with this text found in the user directory here really just added more to just make
sure let's say whoever is working on this case this was the case i gave to my students definitely that they use also different tools and understand what they are working is what's the full path for the file of interest so if we go back to windows uh f users joker and it was this was the image by the way that has that text in there we saw it actually in ftk imager uh it's definitely not a good idea to double click on it so but i know it's an image that's why i did that so the full path will be this and but this will be over here and this will be haha png and it's going
to be like c now it's f just because that's where it's mounted on what is the volume serial number where the file exists this one actually you can you can see that in the allen key so if you go back here by the way and i'm not sure if we hided that or not but let's see
let's see if i actually there's nothing selected
um
these are running case right now in the filter here i just need to ungroup them let's see what happened here
by this column i don't want that because [Music] yeah volunteering number here it is okay great so group by this column we can do that and so we were interested in the file called let me just maximize this again a file called the png will automatically be selected so we can see here that this is the volume serial number uh you can do this by the way or you since you know which uh which file you are interested in then you can just go run lnk uh l e c m d against that specific file and it will automatically also get that serial number for you so you can also do that what is our questions here so we have
that what are the modified access and creation market timestamps in utc for the file so what you can do here this is one question that could be answered with ftk imager if you if you want is by just clicking on the image excuse me and if you just go by the way over here uh you can see that these are the dates when it was accessed it when it was created that one it was modified okay so you can see that uh automatically uh in here so those are by the way the answers to that question the the decode.exe application was used by one of the users provide evidence to uh the next four questions
below be careful this is a tricky question it's really the idea here what i did is if you look so decode.txt is an executable so what we need to do if we look at prefetch files so if we look at prefetch files let's go to the beginning and say decode we don't see any any tool called decode being executed that's not available but we do see this dd dot exe executable that's one but how do we prove that they are the same tool so what happens here is the reason why i said it's tricky is what happens is happened is probably the user joker copied this file named it dd.executable and then run that executable
you can think of this as a way to masquerade whatever the user was planning on doing so that way when you search for that executable you won't find it but what we can do here is because we didn't find it in prefetch so what we can do is use a hex editor i we use at the college and i would say everywhere the zero one zero editor you can download a trial version for 30 days and what i will do is i'm going to open those files so if i go and open those two files users and then joker and then open pd and decode so let's open them so we have these two files what i'm
going to do is i'm going to do a comparison between them okay so what we can do is do compare files so we want to compare these and i'm going to do a bite by byte there are as you can see here lots of other options if you want to uh tweak around and play with it so we're going to compare d code with dd if we do the comparison it did a comparison and it's telling you it's a match there is no like no modifications in there that's one two to we can also do uh checksums so we can do uh a checksum for calculating the nd5 and let's say sha1 for both of them and
just my timer and we can see that these are the md5 and the shaft for both of them now let's say just an example to prove that this is being calculated or the uh let's say the comparison is being done correctly let's say you go and modify this byte let's say you do like a a just something like that and now if i do a comparison again so if i do a compare between them again again i want to compare bite by byte and do comparison see the tool what it's telling you this is by the way zero one zero has a lot of great features i might do a whole series about how to use it because again we use it a
lot at the college you can see the good thing about this is telling you that from this location to this location by the way the size isn't my the the files are a match but we have over here and it's highlighting uh those are the two bytes which are actually different and then it's also telling you everything else after that are also a match so even if those if those files were not a match or if they were modified in a simple way you can do that there are definitely more better ways to do that more ways i would say to compare two executables especially but this is a basic way to do that with
a 0 1 0 editor so if i go back to the questions uh which user did run the the this application if we look at the executable it was run by it wasn't the joker's directory that's one we just need to make sure that the time when the user joker was logged in maps with the time of the execution or it's within that time frame so that proves that and you can get that by the way from uh the sam file which is another registry file that tracks all of the different user details uh the the details about the user uh so that's one uh also how many times was it used again we can see that here
how many times it was used the wrong counter says one you can also use pecmd to do that this is again just another way just so you don't say i'm biased even though i am biased to alex tools to be honest with you one was at last used you can you can find that over here which is when was this last used and where was this application located you can just go and put that full path over there which is it was in c users joker and then dd.exe so that's i would say it for the session i tried i would say to go over the tools why we use them a little bit about details about
why we are passing this information uh how you can combine all of this together the only thing probably we didn't do is uh is do us like a super timeline you can do that or what i would recommend by the way that's my opinion is you can especially if you have two systems or two workstations to work with it depends on where you work and your work environment but we do have that so what i can do is have a super super timeline being generated while i go and look at the artifacts in let's say the different locations one by one by a time depending on what am i looking for what am i trying
to answer uh etc and then once the super timeline is available i will just pull that in and look at that and figure everything out in a coral chronological uh kind of order so uh yeah that's it for the session i think we have a couple of minutes left if there's any question that i can uh quickly answer so thank you so much doctor for the wonderful workshop that's really helpful there are many questions coming in which are one question about if there's a tool uh recommended to that come works across all platforms like linux mac and windows if there's a tool you you would recommend that's compatible with all platforms what was it it will have to be a commercial
tool i don't know of uh i don't know of a like a open source tool that can do that but if you are talking about a commercial tool then axiom magnets uh axiom uh [Music] and i know it does windows mac and uh also even mobile and even uh a couple of months ago they announced that now it does linux we also use axiom at the college and it's a it's a really great tool by the way it also makes your life easier this is by the way not kind of any uh i i'm not i don't work for axiom so i'm not trying to sell you axiom but we use axiom at the college we
i would say we have most of the tools at the college uh but again we do not tell our student which exact tool to use we show them the tools then it's up to you to use it just give me the answer because regardless what tool you use you should come up with the same exact answers so axiom is what i would say can do all three windows linux and and mark yeah some people are asking about that book that you have just just mentioned i think i have shared them in the chat for everyone so i hope you can i would like the book uh i will add a couple of books and a couple of
websites i know elon has a good website as well so you have dfir dot training that's a good resource it's an excellent resource uh elon which if you google a few search on twitter dfir diva that's what her handle is she also keeps update there's also the monthly monthly focus on digital forensics where there are lots of names by the way so i do apologize to those folks out there that i don't remember their names uh what what he does is really a great thing is he monitors all of the let's say the blog posts all of the research that gets published every week every month and just summarize them for you i highly recommend
you check that out uh i will add those into the list and also cyber fight w but that's probably a shameful plugin here our courses some of them are free some of them are not you can also check that one thing i can say about c5w is if you're a student and you can't afford any of our courses please just send me an email and i will waive that course for you so you'll get it for free
there are questions about the dumping dumping the memory how to do a memory down if the machine was affected by a ransomware if the machine is infected by ransomware then you'll need the tool which can be used to memory dom uh belkasoft has a good tool for memory acquisition uh magnet forensics also by the way these are free tools uh belkasoft has one magnet also has one ftk imager could be also be used it's probably a little bit tricky because it might not support all of them uh i know the uh i i forgot the name of the tool but the the company is called the comain i know they are rebranding their work or something like that that's
i think they took their tool offline and they are planning on reintroducing it it's one of the great tools it's a command line it's a command line tool the good thing by the way about i forgot the name i will add that to uh to the document the good thing about that and the magnet forensics tool uh is they have no gui so the amount of i would say the amount of changes that they make to your system is very minimal so that way not like ftk because it's a it's a gui tool so that way it will do some modifications to your memory so it's better to use some tool that will kind of do
less modifications to your memory as
possible we are checking the questions that we have the question is talking about the food yes the company name is it's uh or the c-o-m-a-e is it the one this is the one you have mentioned what is it again
i don't know i don't remember if that's but i i will add those by the way to the document as well maybe after the session that you will mention all tools that have been used in this session sure i'll definitely do that uh they're asking if you're referring to dammit dump it yeah i think dump it they are now rebranding it to uh yep dump it i don't know how i forgot that name actually it's it's very obvious dump it is the tool but i think they took it offline now so you won't find it unless you have an old copy i do recall they are playing on rebranding or something like that so in the meantime i would say uh use
the magnet one or belkasoft or worst case use uh ftk imager but that's a little bit tricky any other questions uh yeah checking actually uh amy suggested that we extract all files of another cursor file hashing for the files and compare them i think that came up when you were talking about 101 tool
yeah 15 10 minutes ago that we extract all files and run a recursive file hashing for the files and then compare them yeah i will add the uh you can uh either have a tool which does the computations those for you all or by the way microsoft since you are using windows microsoft you can you can just use the powershell to do that they are on my github by the way i try to track these down because i'm not good at memorizing things and at the end i do not i would say it's hard to memorize a lot of things so don't try to memorize things but keep them in a document somewhere you can find them on my github uh the
powershell commands that you can you can use they are all listed over there not just by the way for hashes you'll find there also for uh timestamps how to modify timestamps with a local utc i'll also be adding the things we use today you'll find all of them yeah ahmed is asking about automating evidence collection is there any specific tool we can use for that evidence collection yeah to automate the evidence collection process i i would say use keep keep is great by the way uh it can be scripted and automated to do all of that for you so you can just do some configurations and uh i know uh i think uh adam or
even eric i think he has a a workshop uh or andrew i think his name is andrew sorry about all of those guys that i forgot their names there are workshops by the way they are very detailed how to script the this and even how to create your own custom i would say evidence bag so it will then pass that bag of evidence uh for you there are workshops i will add them to the document and this is gonna be a huge list of differences i hope someone at the end there is another question just wrapping up the questions um do you have a specific tool uh no this is the one we we asked
uh do you recommend using autopsy on forensics autopsy is great by the way and i know the the team behind it they if you if you go attend or is the f con which is the the confidence that the company behind the topsy holds every year they hold the autopsy plug-in competition and every year new plugins get submitted new ideas get uh get added to the tool so if i compare autopsy when i first started the using it maybe seven years ago or more than that probably uh to where it stands today there's a huge there's a huge difference between them they do you'll see there's a there's a huge and it's being enhanced every every
year so keep an eye out for autopsy their updates and also the uh the plug-in competition some of the the plug-ins do not get pushed into the autopsy itself but you can go download them those are i would say community supported plugins you can go download them and add them to autopsy and use them yeah autopsy is great by the way just because it's free it doesn't mean it's not a good tool i personally in at the college i would say i mostly in most of my classes except for uh the introductory classes which is what we call the for 101 classes forensics 101 or 100 level classes i will show the students how to use
a toolkit like autopsy or axiom x-rays etc but after that i do not recommend i don't i don't use that i always use a tool for a specific artifact so i would mostly use eric's tools to get uh jump lists to get like i like lnk files prefetch files one artifact at the time and show the student how uh to just look at that single artifact then if you have a if you work for an organization which can pull all those and to want to look it and you want to use that as long as you know what you're doing you should be fine with doing that second the question it was also about open source tool and how people can
start so that's good um we only have uh yes yes and it's a bit detailed um it is why ahmed on autopsy if it has a problem with the multi-core systems did you find any issue when using autopsy while using multi-core system at it does not use all the cores available very specifically any question from ahmed uh i didn't i didn't notice that honestly if i i didn't notice that if it's using uh multi-cores properly or not i didn't check that okay one quick question how do you prevent the usb that contains the dom from getting encrypted by the ransomware while doing live rom acquisition how do i prevent the usb yeah from getting
there is also a right blocker for usps so probably you can use that uh in those cases uh i'm not sure if this will answer that question or not but again this is not a promotion for a company but i recently uh start using bardinix this tool so probably you can do that i know it's for acquiring uh usps i'm not sure if that's what the answer that's the answer you are looking into or maybe try to like uh acquire the as long as you have a light blocker or as long as your usb can have like there are some usbs where you can make them read only uh that way the ransomware will not be able to let's
say encrypted the data and probably then send your data or dump your data remotely to some location or acquire the the data remotely you can probably do that some there are lots of i would say today uh tools which allow you to do remote acquisition so you don't really need to plug in a usb and actually do that a question about this one system i think yeah maybe we can convert
he's tired now
this is really appreciated by community here in jordan and also globally here who attended with us we are so grateful to you dr ali and for your great participation it was really informative and i'm sure uh people will watch it again and again this workshop you're welcome thank you so much and hope to see you all and thank you all for all the attendees by this we're up uh up security besides amman 2021 hope we'll see you with more events uh in the future not knowing but in the future thank you so much and have a nice day have a nice weekend good night yes and good night thank you doctor
you
Related talks
 49:41
49:41 54:05
54:05 27:37
27:37 41:15
41:15 41:25
41:25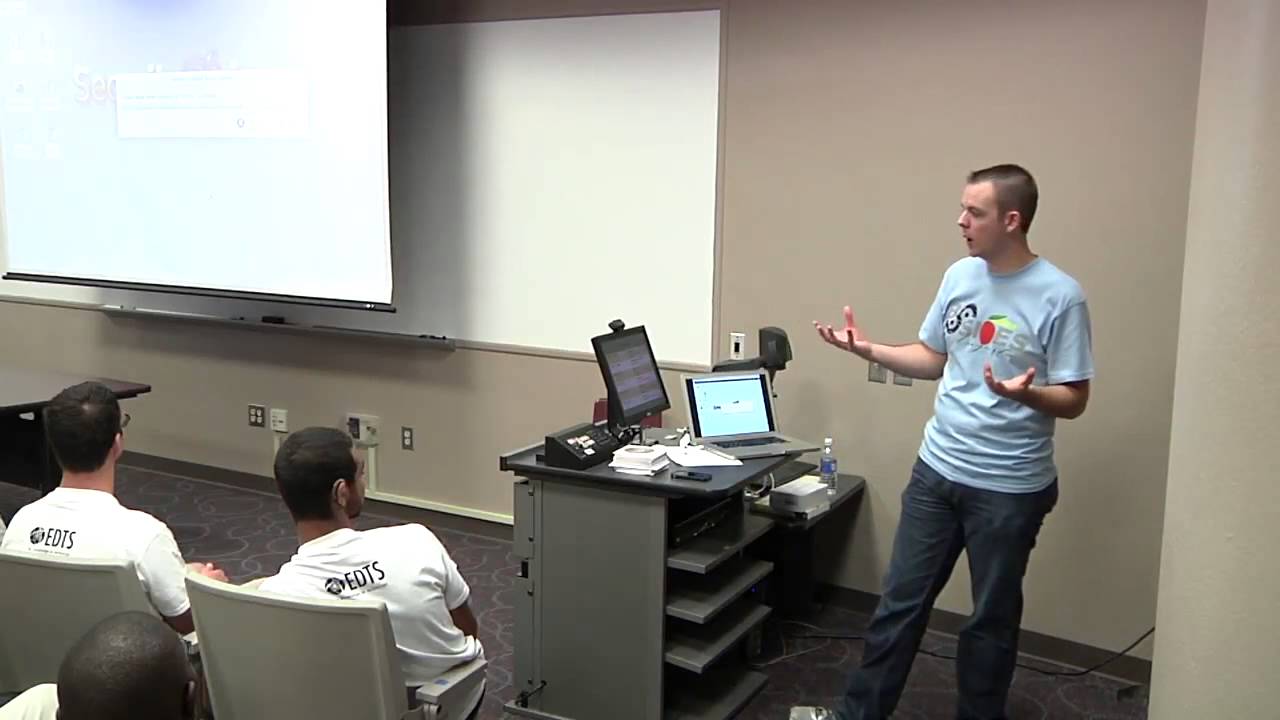 51:37
51:37