Starting Your Homelab - Sciaticnerd
Show transcript [en]
power. >> Yeah, I guess. >> Well, look, that works. All right, let's try this again. >> Hi, everybody. That should say starting your home lab, but it doesn't instead. So, I was on a journey trying to figure out uh trying to figure out exactly what I could do to try and start growing again because I was doing this thing called Bside San Antonio for a number of years and I felt like I needed some personal growth in my life. But something that was making me a little crazy is uh while there are better ways to do this, this is one of the ways I have figured out. By the way, this is the disclaimer I mentioned before and uh
I see lots of pointing. Is everything okay? >> Okay. >> Oh, okay. >> So, there are going to be better ways to do this. This is one way to do this. So, the thing is, why are we always out of space? Have you ever noticed that when you are using your cloud-based services, I don't care whose it is, they all seem to do the same thing, which is to say, hey, you know what? Um, you've used up all the space you have. I went to back up my phone and it said, "Oh yeah, you you seem to be out of room. Would you would you like to buy more storage space?" And it it doesn't
matter which one it is. It always seems like they releasing the same tune, right? And so everything we would love to back this up for you. I've even had the one that's built into uh my current operating system offer to back up more things. Would you like to free up some space on your machine? I said, "Oh, maybe it's going to compress stuff." No, it pushed it straight to the cloud service. And I said, "Well, okay. Every time I turn around, it feels like something is trying to pick my pocket because it wants to give me some more room." So really, somewhere there's a data center with my name on it or something, and all we do over and over
again is wind up running out of space. So the real thing is if you aren't paying for something, you're the product. Well, it turns out after a certain point, you're still the product and they just want you to pay more and a little more and then a little more. So, there's actually a full-on article about this that is kind of neat and it's worth taking a look at this. It's all about how we are gently encouraged towards more room, buy more, pay a little extra. How many of you here have a phone by a big fruitshaped company? >> All right. How many here have one that looks like it has antennas on it? Okay. And and how many of you have gotten a
message that said, "Oh, would you like more?" >> No. >> No. >> I said no. >> You said no. Good. So, the very first time it happened to me, I said, "No, I'm I'm okay with it if it's only a couple of bucks a month." And >> again, >> and then again and again and again. So, as that happens, when they start offering you ads and literally while I was making this presentation, this popup showed up. Make room for your memories. >> I don't have memories. >> Yeah. I'm like, well, what if what if I'm what if what is the movie Momento? I don't have memories. Everything just resets every few days or a few hours.
It's fine. But no, in case I needed to store something, there are other ways to do it. So, what it got me thinking of is can what could I do at the lowest possible level to start myself on this journey? And it turns out it doesn't take that much. And the way I used to think about doing it isn't the way things happen now. So there are lots of easier, better ways to get started with this maybe because if we look at it, you've got, okay, how much is it going to cost me to get some hardware together? Why would I bother doing this? What what am I going to get out of this? Right? And then uh what stages are there
involved in getting this to work? Do I have to learn how that box I got from the cable company or my provider works so that I can figure all that out? We're going to do kind of a speedun of one set of options that should get you up and running with as little as a Raspberry Pi. Hopefully a Pi 4, but I've done it with a Pi 3 just to prove it could be done. You're a little more limited. A Raspberry Pi, who know who does not know what a Raspberry Pi is? It's okay. You're allowed. Uh, okay. And as an alternative, who has an old computer they used to use, but it got too slow and too old? Yes. Yes. So,
those are perfect candidates to start with if they're just sitting in a closet under a desk, uh, you know, holding up the neighbor's cat's box. I don't know why you gave it to your neighbor to do this, but I'm not here to judge. So, when you're looking at the different use cases, you can do everything from actually running events to hosting event management software for others. If you've ever heard of the Fedverse, you can prepare any number of fantastic things to be able to to run on your own machine. And you might say to yourself, well, isn't that kind of risky? Well, sure it is. Everything comes with risk. The risk is that there's an outage on
the East Coast and you can't get to your stuff or, oh, you're out of storage and you have to pay for more or any number of things. is the internet is out or the cat is standing on the keyboard and you're you typed the wrong password too many times and now you have to sit on hold for an hour and a half just so you can try to explain that Muffy was was just running across because he saw something on TV. You don't know. It could be any number of things, but there are always options. But I'm going to recommend that the starting point is to build an anchor and from that anchor you kind of spread out. So get some kind of
password manager. I don't care if you are using one that is only on your machine or is cloudbased. There are free options. There are pay options. There are small books you could get from a vendor in the other building today that you could use to write up your passwords. But the key element is please don't reuse passwords. Right? That's the biggest thing. Okay? So if you reused, who here has ever suffered from password reuse? Like something went wrong and because you weren't thinking about it this way? I I did it. So like earlier on before I got burned by this, I would use the same password across a bunch of things so I didn't have to
remember more. What happened? Raise your hand and tell me what happened. >> Data breach. >> Data breach. What else? >> Anything? >> Stolen. What was that? >> Account takeover. >> Account takeovers. And then once they get in one, what if they suddenly catch Y? See, earlier on it didn't seem like such a big deal, but now they're like, well, wait, if I figured out Jim Bob password 105, maybe Jim Bob password is on this service or that service, so they're going to go and do stuff. But no, because the world is all about automation these days, they'll have a script and they'll put in a simple phrase and it'll go try it on a bunch of
sites. At worst, it locks you out of a bunch of sites at once. At best for them, they get access and can take over your account and your profiles on socials. >> Would it be better if you have two factor authentication? >> That is a great idea. Who here heard that? Two-factor authentication. Multiffactor authentication. Something you have, something you know, something you are. Yes. >> What uh what is the second form of the Are we doing it like through like an application or are we doing it like text? >> There are options. So if you are going to consider multifactor authentication something you have could be the uh a token a physical token I I will I
literally >> yeah exactly right there's a thing called the Ubi key I'm a fan of uh it generates a specific code you can there are multiple ways to do this there are literally endless ways to engage with there are pass keys now right who here has heard of pass who's using pass keys pass keys so this is kind of a passwordless approach that lets to take a picture on a U QR code and on the back end uh something will be stored in your password manager, your uh fruit shaped account or one of your services that will allow you to take a a fancy QR code which will be the equivalent of now this does mean that if somebody walks up and
goes bop and takes this and somehow is able to get into it, you're at risk. So insecurity, the truth is that all almost all risk is moved, not truly mitigated, but you do the best you can, right? And the answer is don't hide under the bed. You have to do something. So when we're talking about doing something, choose one of these. There are free options on almost all of these uh platforms or options or again even if you decide to write it on the back of the milk carton, tear that milk carton up and store it safely. Whatever method that works best for you and your use case. However, if we're looking at which of these things
to take a look at when we get into the risks and uh there are stages to get to to build things out. From my point of view, I have this particular build starts with the idea of I need to get a machine. So, I need hardware to run it on and then I'm going to work my way through how am I storing it? How am I going to connect to it? How am I going to secure that connection? And then what is actually doing the heavy lifting here? So if you think of a Raspberry Pi, it's not necessarily got the most power, but it turns out it can do more than you think. Yes. >> So I have the old computer. The only
like I want to use it for like a server or whatever, but the only thing I worry about is having to keep it on 247. >> Okay. To repeat the question, uh the a person has an older computer and their main concern is having to leave it on all the time. Well, now if you're going to self-host, that is a reality is that that piece of equipment needs to stay on. Which is why a Raspberry Pi or a project single board computer SBC is an option because that usually uses less power, less heat. If you have an old computer, it's a great place to start. If you find, right, consider it your training wheels. If you have that old
machine that runs and you have to listen to that fan and it sounds like a a lawn mower or weed whacker going off in your closet overnight and that's too much, see if you wind up using the service you build for yourself. And if it's really something that you get into and you start to really build out, look at how you're going to rebuild it. But why would I want to rebuild it? I just got it working. There are also migration options. The point is, if you find that once you get your feet wet, that you like what you're discovering about yourself, about your configuration, and about your options, then maybe it's time to consider ways to
get off of the weed whacker in your closet, the angry bees in your under your bed, whatever it happens to sound like. Or if you buy an old server like I did, it sounds like a jet engine in the next room raising the temperature of just that room by at least 4°. Um, but dang, it was cool. Well, neat. Not cool. Anything but cool. It was warm. So, okay. So, now again, we go through these sections and let's look at these things and break them down a little bit more. So, any um anything you do requires that anchor. And I said the starting point was the password manager because now that you have that, you're going to
create accounts for each of these things. And I'm saying with what I've done, I started with an email address from a popular service where you can get a free account. The reason for that is is there are specific authentication methods for that service. I went with that service because uh as you'll find out here uh it allows us to connect securely without opening holes in my router because it sets up a software network card and connects separately which means no visible visible to the network holes in my current configuration on my home gear. That to me is everything. So now that means yes I do have to install the client on oh there's a light on uh client on
everything I use which includes my mobile device but it turns out there are clients for each of these things. I have it running on things as diverse as the um NAS or network attached storage at home. I have a client running there. I have it on my mobile. I have it on my laptops. I have it everywhere but the toaster. Um, and I do have a mallet next to the toaster in case it goes live. So, you have to be careful. I laugh, the toaster laugh. It was a good time. I brought the mallet. So, uh, anyway, so we're working our way through establishing an account to spiral out from. Right. So, I need to establish
where I'm storing the password. Then, let's get to the email address. We do the email address. So we have an account that uses a an OOTH2 type or sharable usable authentication mechanism which then allows us to get a domain and point it to our stuff. Who here has set up a domain before? A bunch of you. Cool. Who here is using a free domain service? >> Right. Okay. We'll get to that in a minute. Don't worry if you're unfamiliar. And if you are familiar, well then you know that there are limitations to it, which is why it might be worth spending the $12 depending on where you get it and what what domain you're willing to go with. There are
advantages and disadvantages. All of this to say once you're connected, I'm saying go ahead and for this demo, I created a completely standalone email account that I built out the entire thing on with a Raspberry Pi. And by doing that, it enabled me to set up something that wouldn't compromise my existing everyday use stuff, which I do recommend if this is your first time building something. That way, if it goes all wrong or it gets some way um it becomes vulnerable, you are not at risk with your day-to-day daily driver stuff. Let that be for something you as you grow and figure out because it takes time. kind of like when you're uh filling up. If you have ever poured if
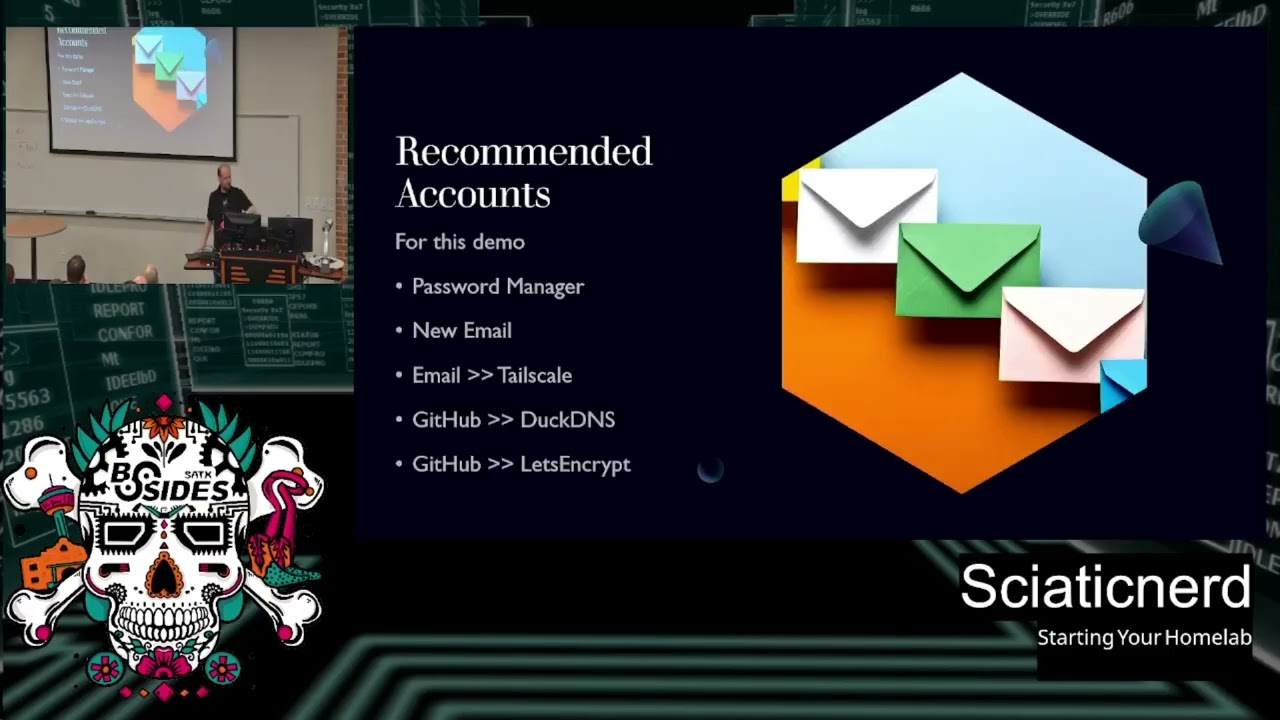
you've tried to pour oatmeal from one thing to another, it doesn't immediately take the shape of the thing you pour it into, it takes time. And as it sits, it will spread out. And in a way, I'm saying that's what this experience is like. You need time to get used to what is happening, what's going to break and go wrong, so that you can then go back and look, which is why you also use extra gear you have laying around as you do this. Now uh we are going to be using our password manager to create a Google account which we will then use to authenticate to tail scale which will establish our account and our credentials there from tail
scale which we'll get into all the what is thats in a minute. We will then use that same uh basis to create a GitHub account document that which allows us to authenticate to duck DNS which is a dynamic DNS service for the free tier. You can also use other ones like Cloudflare and things like that. And then from GitHub, we go and get our let's encrypt because one, they all build on each other and let's keep it moving. So, tail scale when I originally wrote this only allowed specific open off OOTH supporting types of authentication. So, you had to use very specific services to make it work correctly. They have recently said oopsy daisy because it turns out
eventually uh they weren't expecting to be as popular as they've become and so they've worked out a couple of additional authentication methods including pass keys. I am a user of one of the commercial password managers and it supports pass keys. So I can actually create pass keys from a desktop and then quickly log in using this as the back end. it goes and knocks on the door and says, "Hey, I want to use that thing instead of which will protect you from certain risks." You of course can go straight the way this is even using open IDC and it will all work just fine. Okay, next stages accounts for other accounts. Yes, we are trying to stack
things on top of other things. Like I said, a speedrun. So, Tailscale and GitHub need that email address because they want to verify your account. You're then going to use GitHub to authenticate uh as one option for getting into your tail scale, excuse me, uh into your yeah tail scale and duck DNS accounts. You are going to need that information to feed Cloudflare or whatever service you are using as your DNS management to populate. What is dynamic DNS? It is a way to say I didn't pay for one address in cyerspace, but I can reuse this one. It'll use a service to say, "I'm over here now. I'm over here." And that way, even though your name is
uh lostkitty6.ductns.org, you can still change the address on the back end because you didn't you didn't pay for that. If however you choose to pay for an actual domain, you can still route through another service to help you manage this. Let's keep going. By the way, too fast, too slow. Are we okay with us plowing on with this >> question? Okay, good. Now, now that you have your identity, you can use that authentication mechanism to get your domain validation, which is huge because domain validation is what allows us to get a free Let's Encrypt. You want the Let's Encrypt so you can connect securely from anywhere on the open internet because let's encrypt participates in the browser web browser
root CA program. That means that I don't have to go and do any squirly, oh look, uh, there's a server over here I've set up. I have to take this thing I custom made and put a copy here. Now I need to take the same thing I made that isn't commercially viable to everybody and I have to put it over here manually. Nobody wants that. It's too hard. So to make this easier, what you're going to do is get a let's encrypt for free. And the way that works is to be able to validate your domain. But it has to work backwards and forwards over the open internet which means you have to work with and trust or rely on DNS, the
domain name service. It's always DNS. >> I don't care what it is. It's always DNS. I even have a bracelet to that effect. It's just I forgot to wear it today. >> DNS. >> Because of DNS. Exactly. >> DNS. >> Okay. Now, stages of your build. Let's imagine you're using a Raspberry Pi. Uh, I was able to successfully do this with a Raspberry Pi 4 and an inexpensive NVME or SSD drive I got off Amazon with. If you ever buy things from Amazon and they say, "Would you like to wait a few days?" You do enough of that and skip the instant fast shipping, you can build up a couple of credits or go ahead and
and donate blood and you can get gift cards. And that's literally how I bought this is I >> like that. >> Well, I like your company. I like that. I like that it's possible to take instead of getting free shirts. I I liked the shirts when I donated blood in the in the early as now I I use they have points and I can take those points and convert them. I'm not suggesting that you have to give blood to get points. I'm suggesting that there are ways that you can make it more affordable to get inexpensive gear. >> You okay? >> I'm sorry if I've made this talk too boring. If I'm actually putting you to sleep,
raise your hand. No, wait. I don't think that would work. You all right? Okay. All right. >> So, now Pi4 NVMe, an old PC cloud VPS. I tried this as well because at one point in the process of building this out, the power went out at my house and I couldn't play with my toys and I got frustrated cuz I was traveling. I said, "But but how do I play with my toys when the power goes out at home?" And so I figured out that on the uh Black Friday, Cyber Monday, you can get ridiculously lowcost deals on instead of paying monthly fees, they offer uh hey, would you like to pay once a year for the
effectively a Raspberry Pi in cyerspace? And that's literally what I did. So for under 50 bucks or around 50 bucks plus tax you have a virtual machine in space in in the computer space and you can connect to it and then if you wish go ahead and put tail scale on it and we'll get into how that works in a minute. But the point is it'll stay on because it's in a data center and it's more likely to stay up than if you live maybe in a neighborhood that has iffy power. So, now that you have your hardware, you're going to go through basic Raspberry Pi prep. Raise your hand if you have not done this before. Okay, there are Oh,
there are more of you than I expected. Okay, so the great thing is this tool called the Raspberry Pi Imager makes this ridiculously easy to do. Download it from Raspberry Pi Foundation.org and get the Raspberry Pi Imager. Select the model that you have. And again, I took an NVME uh small non-moving part hard drive, stuck it in a little case, plugged it into uh my laptop, ran the Pi imager, and made an image. Tada! I had a machine literally. And so I took it from there, plugged it into the Pi, and booted the thing. You could also do it the oldfashioned way and use a little memory card and SD card, which is a fine
way to start, but they have a more finite lifespan. So just keep that in mind. There are ways, by the way, of taking even the oldest Raspberry Pi machines, booting off that SD card, and then telling it, "Hey, look over there." So that once you've set up the initial run of the OS, you can then populate an external hard drive that'll run off of a powered USB. So I have a Pi 2 that's running a full-size hard drive that has a plug in the wall, but it actually uses an external hub because the Pi doesn't have enough juice to power it itself. But that's also a valid way to do this. all of these methods because I was like,
what's the least I can do this on? Which was the whole point of this. So, if you choose to go through the basic process, take your device, whatever it is, go through the steps, choose the operating system, choose the headless one. It's time to get good with the command line. Who here has never used a command line? Oh, see, everyone here is like, "No, no, I've got this. I've done this before." >> Oh, my command line. >> Uhhuh. >> What kind of command line? >> What kind of command line? Yeah, it's okay. Who here is Bash? Bash. Hi, Bash kids. Okay. Oh, ZSH. Good. Who? Who's Who's T-shell? Any T-shell users? >> Nicks. How about Nick? Any Nix? Aha.
Couple of Nicks. Fish? What is fish? Tell me about fish. Okay. Later. Tell me a fish later. So, I just read about that like last week and I'm like, fish? Okay. Well, there are all kinds of ways to use the command line and all kinds of fun things you can do with that, which is going to be my next talk because I found that T-Mox is amazing. There are so many just text user interface ways to do things and it is ridiculous. So now I I again that's another talk. Sorry I'll stay focused here sort of. So once you go through Hey, look at that. The PI Imager makes this super easy because you can actually edit detailed settings and
you can set up what Wi-Fi you want it to connect to. Enter the UID and password stuff. Makes it super quick. I don't have to learn all these things even down to the point of knowing, hey, I'm going to be in this time zone. So it'll set the date and time for me because otherwise I I ran a volunteer class and the first thing was hey how do I set the date and that was half of a class because if you've never done that in Linux it's not just clicking a it's a step once you once you know it you have to know it but why bother if you can just do it here and it'll do it for you
in a quick script. Next, now that you have that here, there are ways and things you're going to have to do a little bit of prepping if you're trying to do specific things. There are a couple of helpful tips that you can do, and I've included a link just in case it's helpful for a very specific use case in case it comes up. We're not going to dig deeper on that yet, but it's there later on when you're like, "Hey, I hit this error. Wait, wait, wasn't there a slide?" Okay, now moving on. Here's a weird thing. So, maybe you don't have two monitors at home. you only have your laptop and you are in a
you know how how do I do this and not break the bank? I don't want to go buy another monitor. P.S. If you're looking for spare hardware gear, don't miss out. We're in San Antonio. Look at your pawn shops. Your pawn shops are loaded with offloaded gear from other students and things. And there's a great pile of old TVs. If you are using a Raspberry Pi, they use HDMI on a Raspberry Pi. So, that's a way to get an inexpensive TV uh at a ridiculously low Yes. price. >> Like there's also like the um Goodwills, like the thrift stores. >> Goodwills, thrift stores. Another excellent point. Yes, there are lots of ways to look for lowcost gear. Uh and if
somebody on a a forale site tells you that they just have to have their cousin come and bring it to you or want you to go outside of the for sale site to buy things, skip all that, please. There are far too many scams out there. Please do everything in person for these things because hey, this is about your home lab and you wouldn't invite random people into your Well, I it's not for me to judge, but I would recommend against just letting random and that's what a lot of this stuff with with some of the online forale sites are. So, yes, go to your thrift towns and your thrift places, go to your Goodwills, go to
places, go to garage sales. If you're going through a neighborhood and you see a garage sale this weekend, see if they got an old TV to hook up. or for a little bit of money, about nine bucks, you can get one of these, which is a plug that is actually a USB 3 uh converter for HDMI, which means you hook up your Raspberry Pi. If you're on a Windows machine, for example, go ahead and launch the photo app in there, or on Mac, you use uh photo booth or one of those, and you actually can switch to the camera, and when you're switching cameras, instead of front back, when you hit it again, you will get an HDMI input
from this thing. And that means you have a surprise extra monitor and you can tab your way back and forth and move that window out of the way. And here's a great inexpensive way to add a whole second screen without buying a second screen. Okay. Now, once you have booted your Pi for the first time and you go in and get your login, you are going to do most everything once you get used to it over SSH. Who here does not know SSH? What? >> Scary. >> Okay. Scary. >> Yes. So, it is scary because now we're in command line land. But here are the stages we want to do. The whole point is now that you've done this, this was just
a way to show off what it would look like when you plug in that screen. It may not be colors, but it works. Okay. Now, any Linux machine, the first thing you should do when you get it all up and running is run your updates. Great. Now that you know how to do that, once that's done, we have to do a little bit of network configuration. It turns out you can do it straight command line just like this. And here is literally a breakout of how it's going to be done. Or you can use NM which is network manager TUI. NMTUI will allow you and I didn't realize it at the time I wrote this will let you use little
texton way to easily set up your network configuration and not have to do this. But once I learned this I'm like I should share about that because that's yet another way. Okay. So, now that you've set up your network and you're on the network, you're going to want to secure the communications between your new home server and the outside world. And the way I've chosen to do that is a service called Tail Scale. By the way, there's a self-hosted version of this. There's a self-hosted version of almost everything. And it's called Headscale. And so if you feel a little nervous about giving someone else and relying on someone else for your connectivity and the passing out of those keys, you can
literally download and build it out yourself. For the sake of convenience, we're using the tail scale service, which when you go to use tailscale, it is a way to add a softwarebased network card on your machines and then it will create and pass out secure keys to each of the devices you authenticate from. the free tier of which gives you I think up to five separate loginins. And I thought to myself, self, maybe you could login as you on all these devices and it wouldn't mind. And it didn't. I said, okay, how many? I'm up to 30 devices so far, sharing my own private network that only I can get to. That's pretty neat. Did I have to open
any do I have to know how my fi my firewall works or the home gateway? No. It just it just works as long as I log into the client on that machine and then on this and then everywhere else I want to use it. So it's almost like an extra layer of login, but what it's like it's it's the login to your house or your home lab at least. Okay. So now that you've done this here is there there are two commands. You can copy paste them right from their web page and just all of this is just about copy paste. Once you do that, you're going to want to find a way to establish a longlasting
way to connect to your own stuff, which means you have to be able to point out the domain name of your server to put in to what we're going to do next. So, you go to a service like DuckDNS, which is free and allows you to establish a name. You have to choose a name that someone else isn't already using. And by doing that, go to duckdns.org. They require you to log in a specific way and that is the GitHub account we talked about earlier. So you're going to log into that GitHub account you created which gives you once your web browser is authenticated there you're going to open another tab go to ductns.org and say I
want to sign up and it will authenticate based on the fact that you already logged into GitHub. This gives you the ability to set an IP address. And here's where it gets weird. you are going to use the address you get from tail scale and that's the address that goes into your duck DNS because if you set up example local cloud which I did and you want to hit that address you have to give it an IP address to go to tail scale will assign one to you because it automatically does it every time you join an item to your tail netet is what they call it when you join and log in there it's going to say oh we see you
here your new IP address is not the the one you normally use1010 something now that you have a custom address or I think it's actually 100 up there now that you have that address use that and it is not going to change as long as you're still using that same device that same login it's not going to change that means that I can go and do whatever I want and it's going to show up here on my tail scale admin page I do this now I've established how to route route from the outside to the inside, which means I now need something to route to. And to do that, we're going to add a little extra protection for
ourselves because we don't want everything in the house to go over here. We can use what's called split DNS and set up a fancier configuration so that we can say if somebody tries to go to my custom duck DNS address, I want anything that hits that to route to these specific places because you have been given specific name servers. It's always DNS name servers that you're going to want to route to. So you want to make sure that you tell Tail, hey, um, no, no, if anyone knocks on the door with with this, send them this way. And that's what this is doing. Questions at this point. Who here is utterly confused and turned around? And that's okay if
you are. >> It's the good. >> Okay, it's the good. Okay, and I promise you this is building up to something good because now we're getting into what we're going to run on our machine to make all of these separate services run. And that's called Docker. Now, you can use Podman, but I can't vouch for Podman. I know Docker well enough. Actually, I don't know it at all. I followed a bunch of tutorials to get here. And let me tell you something, it works. And the more I learn about it, I I realize that I am like if there's a 10,000 foot view, I'm at like 9,995 so far. So there is so much more to go
with this. But if I follow the steps, it works and it's enough to prove that it works well enough to do the next thing. So when I go to use Docker, you're going to install Docker using what's officially on their page. I actually have you here's what it does. If you follow the link right there, if you are using a modern day phone and take a picture, you can probably just click the silly link. The slides will be available later, too. So, by following what's on the page, you will copy and paste that into your command line, and it will run this script, which will install Docker. You will need to reboot or restart your
services, and that makes Docker available to the system. Terrific. What does that mean? Docker is those three raccoons in a trench coat that are going to make better use of your hardware than you will. When you install your operating system on your machine, it says, "I've got this many processors and this much memory and I can do these things." Docker says, "Hold up. I'm kind of like a bento box and I can subdivide all your stuff up and make it work a little bit. You want a little of this? Great. You can have some of this. Oh, you want some of that? Great. You get to have some of and it sits like a layer on top. And by doing that, it's
possible to use this to add an entire another layer. And this is the one called Cosmos OS or Cosmos Cloud. This is the one I found while I was rolling around the self-hosted subreddit. Any Reddit users in the room? Yeah, a few. Okay. So you're you after this talk, if you decide to try any of this, I'm going to strongly encourage you to hang out in the self-hosted subreddit and just tool around there for a little bit scrolling through stuff because there's there's a lot. Now, Cosmos Cloud is this amazing. It's like a platform. It takes and ties together a bunch of other things that I won't have to do myself. It takes all of these other
things and allows me to with that command line because what did I do? I installed Docker. I rebooted. I run this next command and it pulls down all of the Docker containers and things I'm going to need to run this service. Now, if you go to the Cosmos Cloud website, there is a slightly more updated method you can use that will take over the machine and make it a systemd service. I am not always happy with systemd stuff, but that's a whole separate. The wrong beverage is in this cup to have that conversation. But you can do what you like. Now, this is one option and this will allow it to remain completely dockerized and
virtualized. You do what makes sense for you, but for the sake of this conversation and demonstration, it runs. That's what it looks like. Very exciting. A lot of text will show up on the screen. And you'll see little things move from the left side to the right side. And at the end of all that, it will now give you a message and it says, "Hey, now that I've installed myself, you should open a browser and point at this location because you're going to have to have filled out some information to get this configured." This is just the staging to actually do this. And now it says, "Welcome. You are going to do a couple of things and tell
me the stuff." Basically, it's the stuff you've been doing up until this point, right? So, evening one, you can get this far. I would say this is a good evening. If you get from the PIOS imager to getting Docker and getting this on there, you you've spent probably potentially depending on your connection speed, your stress level, and the CAT, you you may wind up having spent about two hours, and you may feel a little little worn out. But if you can stick through just a little more, it's going to say there are four major steps here. And what you're getting out of this is you're going to put in information to uh hey, I've got a database that's up and
running. So it says, oh, look, I found Docker. I needed that. Great. Now I want to go ahead and hey, I don't have a database. Can I go do that for you? And you're going to go, sure. Click connect. And it will generate the database for you. Automate the whole thing. You don't have to know what kind of Oh, this is MongoDB. Now I have to know the commands to m Oh, I need to create a user for that. No, the script it out. It does it all for you. Once that finishes that, very exciting. Again, some left to right action will be happening on your screen. When it gets done, it'll say, "Hey, look
at that. I now have a database. Cool. Let's go next." Once I've done that, now the confusing bit. Okay, one of them. This is how we set up the certificate. And here is where I say this might be a good point to take a break for the evening because depending on what time you created your duck DNS domain or went out and bought a domain and then pointed that at or oh look I have an IP address that I can point to. It takes time for DNS to propagate. Propagate. A fancy way of saying copy to every other DNS thingy out there. Well, that's like saying, "Hey, do you have my number? I sent it
to you." Well, did I get it yet? Uh, no. Okay. So, you're going to run this and then nothing happens. Do not be discouraged because this is where the duck DNS came in. When we created it, if it's the very first time, you will be successful in 15 minutes potentially. Very first time. If you make any changes tomorrow, I don't know why it's suddenly much longer, but it seems like replacement updates take longer. However, the output of that is I created my example local cloud and said add the domain and whatever address I have in my tail scale admin page, I'm going to add to that representation. So basically, here's the name the internet can see,
here's where I want you to point it. That's what you did at duck DNS. Now we have to wait to see if DNS is going to propagate replicate so I can find it again later. All of that to say bam cool. Now I need to type that in in my configuration in tail scale if I want it to go faster because I need I don't want to just rely on basic things. I want to tell tail scale here's how you find a better copy of the phone book DNS so that you can look at my name and hopefully have it done faster because if you're like me you're impatient. Okay. if you're still with me. Who's
lost? Who's still awake? Okay. Oh, I got some thumbs up, aren't we? Thank you for the participation. Okay, now that we're here, what this has done is we are now going to tell it, oh, by the way, this was the, hey, if you want to actually try to make DNS faster, you can say go look at the Cloudflare stuff and here's how you do that and you create your split DNS entries so that you can again tell tail scale, here's how to look up my stuff faster rather than relying on what's out on the open internet. Aside from that, back to Cosmos Cloud's login stuff or sorry, establishment and setup page. So here we are at stage uh three which is
the basic HTTPS or is it four? Three or four. You're going to type in the address that you want it to be. And what it's going to do, you typed in example local cloud or at least I did. And when I did that, I also plugged in uh I'm hoping that when I type in whatever that name is and I go to do it, uh by default it's going to say cosmos.local because it thinks you're not connecting on the open internet. you change that to I want let's encrypts and that's when the blank will show up where you can type in the address you want. So when you change it to https it'll say great
get a let's encrypt which means it's going to automate that for you too as long as the address you just set up is available where >> that's right and whose fault is it always when it's not working? >> DNS. That's it. So this is the part that gets really sticky. You put in your information and jump next. And you make sure to tell it you're using the duck DNS service if that's what you're using. There's a big fat list of services you can choose from. I use duck DNS. Which means when I select that, I'm like, well, wait, how do I tell you to go check duck DNS? It will turn out if you look at it, it's like, well, now there
are these extra blanks and you need to fill them in. So you will have custom stuff on this screen when you go back to duct DNS which will be your stuff and since it's my stuff I put something over it like you know tape. So what you're going to do is copy this token value and you're going to take it back to that configuration screen. This is how you say knockk knockock I'm allowed to be here. Duckdns let me in. Let me prove that this is really a domain that you have set up. And if you can do that and you come back to Hello, would you like to advance please? Thank you. Now you come back here and
you will check the box for wild card because I don't want to have to generate a separate search for every different thing I'm going to run because let's think about it. If I'm running a home lab situation, I'm going to want to say my organizing software.mmydommain.com. I'm going to want to say, "Great. Now, I want to do one for my um my recipe guide.com." Well, if you don't use a wildcard certificate, you must get separate certificates for each. The service called Cosmos Cloud will do that for you and automate that if you want individual stuff. But once again, it's down to your friend, your foe, DNS to make sure that it can route all the way back and
forward to find that site. The other way to do that, by the way, if you use a pay for domain service, uh, like a Cloudflare or something else, you can manually add each of the things into your host file, your uh, DNS record that's there, the zone file, and you can manually add each one. That's a separate page. Let's get done with using our wildcard certificate. By doing that, we say update once we've checked the box and put in our stuff. again as long you you should succeed. If when you go to do this, why is that? There we go. Okay, it is right. If it's pointing to the right address, you should see a big check
mark. If you don't see the check mark, DNS hasn't propagated yet. That means you're better off not hitting next yet. But this is what it will look like when you're right to go do it. You're going to then set up the last stage, which is create an admin account. Hey, did you set up a password manager at the start of all this? Great. You're going to want to make sure that you copy the exact URL of this and make sure you update your stuff so that your creative name buddy and then whatever the email address is because now what you're doing is make a subsection of your password management account and start adding each of these
individual services. As you do this, when you go and hit next and apply and restart, now Cosmos Cloud will attempt to automate the getting of your certificate and applying to your service. Provided DNS does not do you dirty. Whoops. DNS did us dirty. Please do not be alarmed. It's always DNS. Now, if that happens, when that happens, uh don't be dismayed. realize it's just going to take a few more hours. So go do something else. Even though everything inside you says, "No, I want to finish this." So I feel a sense of completion so that when I go off to watch another episode of my favorite show to fall asleep to, I feel like I got something
done. Believe me, you have. You have set up and built an OS out on a system. You have run updates. You've installed and done a basic configuration of Docker. You've created a foothold situation for yourself by creating a separate email account address. You've created uh excuse me, entries in that password manager that are different for each thing. And you have committed enough time into this frustrating thing that you are very likely going to keep going. All of this because you know that if you wait another few hours, DNS will not fail you. be patient. >> Oh, sorry. The blood sacrifice is optional. >> Who we sacrificing? >> Uh, no comments on who we're sacrificing. But instead
now, even though it failed before, try again. And there is actually a way to go look at. And here is the word. Who here loves logging? Everybody here, everybody should love logs. You all love logs like you love LAMP because logs are the key to understanding what went wrong and how to fix it. So do not be afraid to go check the log and try again because it's very likely going to tell you something weird encryptic which means DNS failed and you just have to try again. So now we're going to go back and look at our log and when we see because here is our fa fascinating log. If you see information because this is the command
right there. You're going to say sudo means mother may yes and you're going to say system d or system control status cosmos cloud. And if it's listening on port 80 it might not have gotten theert. If it can listen on 443 you will go follow the steps. Trust the process. Do it again. And then when you restart it and we curse DNS and harm a rubber chicken, throw some salt against your neighbor, some kind of I'm not sure, you're going to go back and not give up because you are tenacious. You are committed. You are smart enough. That's what I tell myself. Smart enough. >> People like you. >> That's right, Chris. Thank you. So now
if somebody who's old enough to know that this isn't a duck but a dragon from the game Adventure and I can make this happen, I've got a lot of faith in you and you need to have confidence in yourself that this is going to work out. So by that your reward is perseverance. Now we go back, we reload it again and it will go through eventually. You may have to restart the service. Every time you restart using that system ctl command, you're going to go and check that log like a person obsessed, like you were waiting for tickets to your next favorite show. And when it finally goes through, you will see the note and
you will be able to connect over HTTPS. And this is your login. That's it. Doesn't look like anything much, but trust me, it'll feel like you just passed a stone because this this is secure and is now because it's configured, it's going to update itself automatically. every 30 to 60 days a replacement C will be done automatically and I don't have to fight with it anymore and because it's a wildcard every time I add another part to my domain name I don't have to worry about do I have to get a separate no it'll just work now we can get all sorts of creative later but now that you've gotten to this point how am I doing on
time >> I have four minutes there we go you are now at a place to go get some awesome applications to run on this beast. And now it's time to go look at sites like look up the awesome TUI, excuse me, awesome self-hosted list on GitHub. GitHub has a series of awesome name of thing you're interested in pages. And so if you look up awesome self-hosted, there's a ton of stuff there. Go look at a guy who helps people self-host things on their network attached storage like a Synology or a UG Green. It's called Marius Hosting. Look up Marius hosting. I have swiped bunches from his stuff. I paid him. I went ahead and I donated to that guy because I used
his stuff enough starting out on my network attached device and realizing I didn't want to mix my data with my self-hosting. That's why I moved it off to a separate machine. But he has a lot of starter scripts that can help you off. You're like, "Starter scripts? Well, okay. Technically speaking, you're going to use these configuration scripts. You're going to learn over time. you point it to the stuff on your configuration. So, you learn how to tweak it a little bit. All of that to say, now you can go and get some really cool toys and have all the things you never knew you wanted to host on your own. Host your own password manager
locally on your system or in your VPS, your virtual personal server. You want to go ahead and run, oh, I need an organizer, but I don't like using the the free tier isn't enough on the the big pay services out there. You can go ahead and get one to set up on your own. Set up a wiki, a blog. There are so many good, useful tools, financial management tools, recipe tools. And it's worth it because now you have uncoupled yourself from all those folks who are constantly trying to pick your pocket for a little bit at a time for an extra couple of gigabytes of storage. and you can get usable, learnable skills that will apply
in the real world in your cyber security career field and path. Thank you. [Applause] >> But now you want to back up to the right. >> That's a separate talk. >> Great talking.
Related talks
 51:46
51:46 47:47
47:47 30:07
30:07 25:06
25:06 57:19
57:19 34:35
34:35