Nathan Dolan: Powershell Threat Hunting Recipes
Show transcript [en]
uh so we're here for powershell threat hunting recipes um just a quick bit about myself uh my name is nathan dolan um i've been working as a security specialist with fakira for the last about three and a half years at this point in my day-to-day job i generally work mainly on network security and focusing on firewalls as you can see by a good chunk of my certifications here most of the threat hunting and power shell that i get to do uh is more or less what uh what i'm able to learn and cobble together in when that mythical unicorn of free time pops up randomly so uh part of that always learning side of our jobs here um so i've been
like i said i've been working for three and a half years after i graduated from state with a computer studies diploma and before that i was working as a professional chef for many many years with a diploma in that from saint as well so on our menu today just as a quick appetizer we're just going to do a quick run-through of what threat hunting is i'm sorry but it kind of has to happen in every talk that's like this and then also a little bit of why i'm wanting to why why i was focusing on powershell for this presentation after that the reason that i'm hoping everyone is here is the main course of the demos this being my first talk i
decided to take the cowards route and just have screenshots from the demo from the lab environment that i used which is a full active directory environment but that also means that we can go a bit faster and get a bit more a few more examples in here um time willing if i can control my rambling um we'll have some questions at the end and then also just because there was more stuff than i was able to fit into our time slot just as a quick takeaway at the end we have some a couple more examples that we can that i just want to show you guys and at the end i'm going to just kind of flip through them uh so you
guys so the youtube recording can see the slides and if you guys want the slides for your own use you can reach out to me the email my email is on the first page here so jumping right into it uh threat hunting uh for me threat hunting is when you're actively searching through your network or your uh environment with the assumption that something has gone wrong security has failed somewhere and we need to narrow the mean time to detection in our environment the the general thought being well usually we can catch like we find too many people find out about a breach or an attack after it's too late after malware has already been deployed on the network
they've been ransomwared um they're being distorted um however whatever happened that we don't want to see for our for our clients or for our own uh environments here the goal of threat hunting is to try and find the attacker that we assume is going to be there we assume that our processes have failed somewhere and try and catch them as early in the attack process as possible so that we can minimize any damage that they are causing to us in our network and for me kind of attached to the end of that is also that we want to find a way to atomize this so when we're doing a threat hunt whether we come up with a hypothesis
and we go to look at um and when we go to try to prove or disprove that yes this is how someone is attacking us and if we uh find that yes some we found this particular vulnerability has been breached then good we can we've met that goal of finding the attacker earlier in the process we can stop that and we can remediate it if we are going through a hunt and we find that when and we don't find an attacker then by automating the process that we just went through and we just developed and theorized we by automating it we can say okay well now i don't have to manually go through this process every week or
every month or whatever interval we're wanting to talk about now we can just leave it go let it go and then if anything does happen if that status quo changes then we'll then we can set it up so that it will alert us and we can know and act on that information right away why why did i want to use powershell for this uh powershell uh one of the main reasons is it has very powerful scripting abilities and it is uh object-based uh in some of the demos that i have a bit later on the uh we're going to start scratching the surface of what the object-based nature of powershell will allow us to do
but once again this is uh my own fumblings and learning this for myself that i'm wanting to share with you all um there's still a lot more that all of us need to learn and uh so that we can get even more value out of it one of the other reasons is also just the large market share for it while power while powershell started out just on windows and windows servers it you can now install it on linux and mac os as well so we're able to access and you utilize powershell through more and more of our environments um required mentioned deep blue cli uh deep blue cli is essentially a power shell framework made by people much
smarter and much more experienced with the platform than i am you can do a lot of the a lot of very powerful things with it only some of which i have listed on this slide the reason that i'm not going to go too too in depth with the about deep blue cli this is going to be the only slide that you see about it is mainly that there's a whole bunch of other videos that will go much more in depth about it and also my goal for this was my goal for the end of this talk is so that you guys can take it into your uh take what you see here into your environments right away with a
minimum of pre-configuration necessary there will be some that we'll be touching on but deep blue cli itself requires a sysmon from the system terminal suite to be deployed throughout your environment and properly tuned for your environment um it requires you to already to already have uh some of your windows logging that is some of the windows logging ids that are disabled by default enabled and having already collected logs so that we can properly utilize deep blue cli where i want the focus to be something that you can take back and use right away on tomorrow or on monday um so for the demos we're going to go over a bit of the housekeeping um just
some of the things that are required some of the few things that are required in order to use this or any of the code that we have below and then we're going to go through a couple of example threat hunts so we're going to be looking for file hashes we're going to look for members of admin groups on endpoint workstations and then we're going to deploy and use auto runs also from the system journal suite um one thing to note with the demos below since this was in a lab environment the prompts that i'm using have a bit more a bit more privilege than you would most likely be using in your own environments uh i do i do want to highlight that
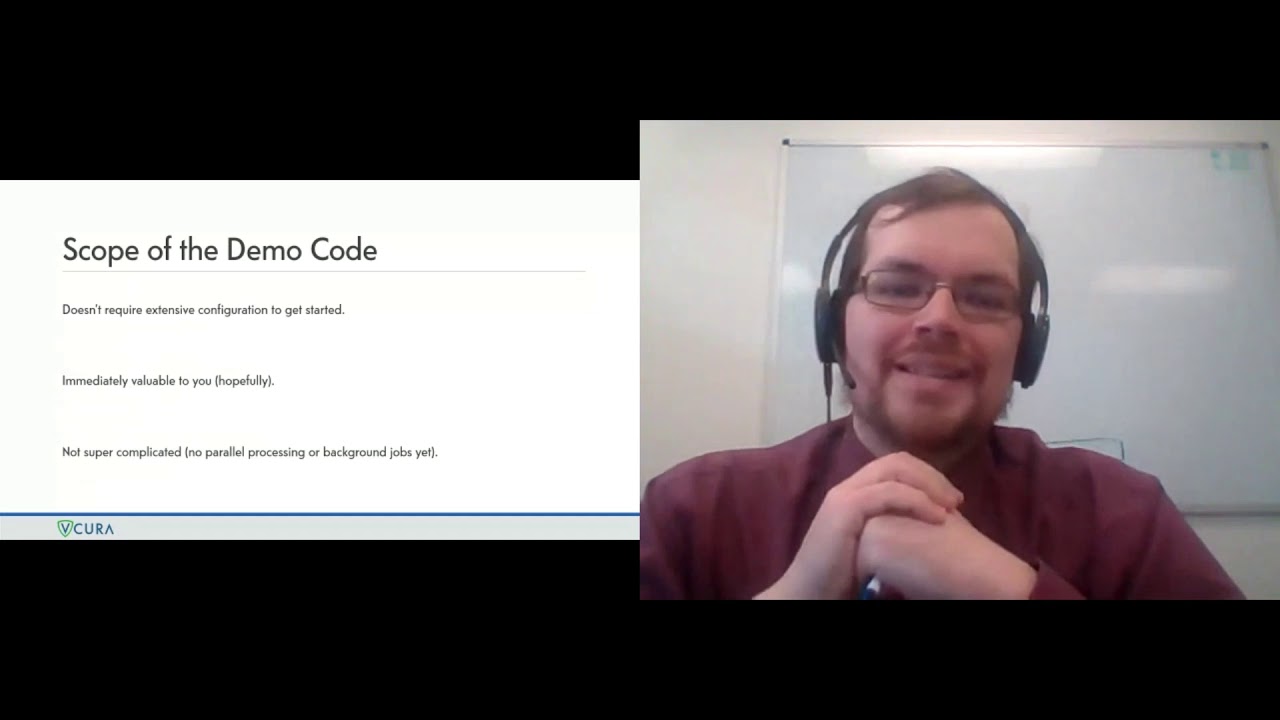
likely if this code doesn't work for you it's because you need to add in credentials and i have the process for that in the take out boxes at the end of the presentation that i'm going to show on the screen quickly we just don't have time to cover that in what we have today and once again just going over the scope it's something that i want i wanted all of these demos to be uh require as little uh pre-configuration as possible and also something that someone who doesn't know powershell can can kind kind of take what we have here and i'm hopefully building this up in a clear enough manner that a complete newbie can come in and do
what they need to do one other note like i said as well since this is just i i still have a lot of powershell learning to do myself so the code here is something that you can use very targetedly uh very in on a in a targeted manner but i'm not quite at the level where i've introduced parallel processing or background jobs yet so in my opinion the the there's a lot of value in the code here that i'll be sharing with you all but there is still a lot of efficiency that we can also still bring into it further down the road as we develop it further so jumping into everything uh in order
to use some of the later techniques to generate dynamic lists that we are going to use uh to target and access multiple computers we are going to need to install a powershell active directory module if you're using if you're used on a windows 10 workstation this is already built into the windows october 2018 update uh you just need to enable it in the optional features and i'll show you how to do that below if for whatever reason you're still using a windows 7 box it's not built in with that with that os and you'll need to install the rsat tools so if you're already doing active directory administration with your windows 7 box you should already have
the active directory module installed for powershell so for activating it in windows 10 just do a search for manage optional features once you're in there you're going to select add a feature and forgive me this is going to be a mouthful you're going to install the rsat active directory domain services and lightweight directory services tools and it's a quick install it's only five megabytes and then you should be good to go uh when you start using uh the active directory commands that you're going to see in the next few slides here you're going to it's just going to load it into your powershell session right away one the next piece here most of most if
not all of the commands you're going to see in the following demos is going to be heavily utilizing invoke command invoke command is essentially the powershell on your local device reaching out to the uh to another remote device and passing instructions to that powershell instance um this is uh this is utilizing powershell remoting which is disabled by default there are a couple of there are many different ways that you can enable ps remoting to enable us to do this work that deploying it and deploying it securely would be in a talk by itself so i have the some links here of describing how to enable it on specific workstations or how to use gpo and
deploy it throughout your environment and here i have links of how to do both of those securely and once again if you need the slides you can reach out to me and i will get those to you so you have the links more freely available to you jumping into some of the more fun stuff uh starting our first command here is we're going to find out how to uh dynamically create a list of different targets that we want to run searches or commands on in the example that you see on screen we are first just going to write out uh manually the target devices that we are looking for so in this example we are using invoke
command and we are going to the computers that are named ann and adam and then in the script block you can see in the uh on the screen there uh the code that is inside the curly brackets there uh the durac and that's the commands that we're actually asking the remote powershell instance to send and use and then it's going to send back the um the results to us this is the uh this is this is how it will look and you'll notice um this is where we start seeing the object um start touching on the object oriented nature of powershell so each of these rows is going to be an uh is considered an object and each object
has multiple properties that we can run different commands on so for example we can we can take some code and say okay well i only want to see files that were created or updated within the last five days or i only want to see files that haven't been written to in the last year so if it's older than a year then i only want to see those results so you can you can start building this out as you go forward and filter it as you want to get the data that you need for whatever you're looking for across your environment i'm starting to pull in the active directory to create a dynamic list we're going to use the get ad group
member commandlet this is part of that active directory module that we installed earlier and then we're going to use that to pull down all of the group members of a computer group within active directory and then we are going to select out only the name field the name property of the returning objects one thing that you will note is i have the expand switch here and i'll probably be mentioning this a few times as we're going through the presentation today but when we're using expand essentially when when the powershell is returning all of the objects name fields properties to us we're going to be emitting the field header and this will have some impacts when
we're using these lists to reach out to different computers this is how it's going to look um just right during this command we're just doing exactly what we say on screen we're just printing out the the target list as it is being returned to us and you will note once again that there is no header it's just the list of the computers that are in my demo environment here that we can use right away and feed into uh some commands which we are going to do on the next screen so in this command instead of listing the computer names uh individually like we did in my first example uh we're doing using the exact same code to
generate that list and then we're feeding it into the computer name parameter for the invoke command and then using the exact same command that we've already used and as you can see here we're getting results back from a dynamically generated list and we're being able to see some of the files and the directories that are on the c drives for each of these computers so predict most likely you won't see anything uh on a c drive but in this particular example there is already something highly questionable that we found just by looking up what what's going on here on the on susink's computer on this in this next example we're going to be doing something very similar
except instead of pulling down all of the group members of a specific computer group object in active directory we're going to look for specifically for active directory computer objects with an active directory using the get ad computer commandlet in this particular example we're just putting putting the code and essentially it's returning all of the computer uh computer objects that that we see in the domain here and once again you're seeing a whole bunch of different properties returning from each object but for the purposes of uh running dynamic lists all we care about is the name field so in this next example we're once again selecting out the name field and you'll note once again we are using the
expand switch which is getting rid of the header and then one more time this time we are looking at fields again of just all of the computers but this time we're wanting to start filter filtering and uh being more specific in what and how what we want in our list so in this particular example we are looking for any computer objects that start with a and a potential use case for you guys is if you have multiple sites and different uh location uh prefixes um you can you can be more methodical in okay well if we have an office in calgary and it starts with cgy you can do a filter on all of your workstations let's
start with cgy and do that hunt today and see what the results are and then the next day if you have um uh you you have a site in edmonton you can go and do another filter and then go for the edm prefix for the edmonton workstations or however you have your internal um your internal workstations segmented here and then once again the exact same code that we were using we're just going to expand out the names and we have our target list that we can use the final piece that we'll be talking about about target lists is you can also save this to a csv or have a csv created here get ad computer this is the exact same
command you're seeing earlier and we're selecting out the name of the uh the name field the name property and then we are taking that output and saving it into a csv using the export csv and uh just wherever you want to save the csv as your path and then we are also putting in no type information so that we aren't saving some of the metadata that might cause us some conflicts uh when we're importing this in the next few slides one thing you will note select object name this time we are not using the expand switch so on the next page when i show you what the output of this is going to be you'll notice that we do have the name
as a header field and this is just how it looks like in excel and similarly how it looks like when we have it saved to a variable and are printing out what the contents of that variable is in this particular example we are creating the variable named computers as delineated in powershell with the dollar sign before the variable name and we are priming it by importing the csv that we had created in the previous examples now we're going to start using a for each loop so that we are able to utilize the target lists that we have created so we're using a for each and so that means that we are going to iterate through
every object in the list that we are going to feed into this loop for the computer in computers dot name uh dollar computers that's the variable that we primed just previously and the dot name here is specific for this use case where your csv list has the header this is us telling the telling powershell that we're wanting to extract the value of each of the rows of the name field and for each of those values we are going to prime the computer variable for that iteration of the for each loop so what this means is if we're looking at the code we're once again using an invoke command and we are going to each computer
so looking at this previous list it's going to go to dc1 then it's going to go to files and then it's going to go to atom and it's going to run der c which is the which is what we've been seeing earlier as you can see the output as it starts iterating through that in this picture here next we're going to start looking for file hashes and a use case for this in to make this in terms of threat hunting is if we've identified a malicious file or an infected file and we want to see if any other workstations or users have this in their own in in their own devices on other devices that we might not be aware or
compromised yet um what so we're going to go through and start building up the different levels of code again until we get to a search throughout our environment uh for a specific file hash as our final example here so first we're going to start off with the command let get child item this is if you're familiar with linux this is very similar to the ls command or the dur command which those are aliases for the get child item command but this this commandlet is has built in that you can reach out to other devices on your network um using the syntax here uh in this case if we put this in a comma when we put
this in the nes english in the next slide when we are targeting a specific computer we're going to be printing out the c drive of that computer and the two switches here file means that we are only wanting to return the files we don't really care about the directory names in the context of this search and then the recurse switch there is also also means that we are going to uh go through each of the sub directories that are that is on the c drive looking and it'll list out the files so in practice here we are we're going to be targeting adam the exact same command that we were just discussing as you can see the files
that uh you can see the file autorun sc which you would which you might have noticed earlier was uh was located when we were running victor command earlier on atom and you can also see that we're starting to iterate through the different folders on the atom c drive and we're getting the file results that we are looking for next we're going to pull in the get file hash commandlet and in the at at its most basic we're just saying i want a file hash for this specific file in the example on screen you're seeing us getting the file hash for the besides csv and that is the target list that we created in the previous examples
by default this will be outputting a sha-256 algorithm-based hash but there are a whole bunch of other other options that if you need a more different or more specific hash of a different algorithm next we're going to pull this together so getting using the get child item we're going to pull out the files that are on the in the existing uh folder because we don't have a path less any more defined path powershell is going to use get child item and just print out the um the file contents of the directory that we are running this powershell session in and then we are going to select out the directory name property the name field and then we're going to use something
here called the calculated expression and this is this is something that i specifically wanted to put into one of my presentation demos here just because this is where this is where we really start scratching the surface of what what we can do with the object-orientedness of powershell so essentially what we're going to be doing is we're creating our own property based on other powershell commands so in the next slide here we're being a bit more i'm breaking it a bit down since this is one of the more advanced things that i have in the slides but essentially we're creating a field or property with the name of hash which is the n equals hash and then we're using the e e equals to
generate the expression of how are we going to populate the value of this new field in this example we are going to be using the get file hash and then it's in lieu of using a path we are using the pipeline variable which is the dollar sign underscore and this is going to take every object that is being fed through the pipe to this command and for every object we are going to take the full name so that's the dot full name from the pipeline variable using that full line essentially using that full name as the path for the get file hash you'll remember when we used the get file hash there were multiple properties as a result of that
command so we are once again uh segmenting that and we're saying we only want the hash value so that's the dot hash after the parenthesis get file hash command there and that means that when we are populating the expression the value field of the new hash field we are only wanting the hash output for the for that command and this is how it looks like in practice so we are using the get get child item we're outputting all the files in the in the user in the directory that i was working in here you can see the full path you can see the file names so you can see the directory name which we're selecting out you can see the name
of the file which we are also selecting out here but you can also see the hash that we are generating for each file here the next step is pulling this into the for each loop which we've already covered and this is going to go and pull out the start hashing on your target paths and however you define the search here against all computers in your computer list finally on the last piece here we are now going to do a specific search for a specific hash that we believe or we know is malicious throughout our environment um so going a bit in depth we are doing a for each loop so every computer that is in our target
list we are going to go to a specific drive as eliminated by the path for get child item we are going to select out the directory name the name and we are going to generate the hash as we did in our previous example and then we're going to say pipe all of that output and we're going to say where the hash and once again you'll note that we're using the pipeline variable so all of the objects created all of these all of these objects that you see here we're going to pipe each of those objects in and we're saying we're looking at the hash property of each of those objects and then we only want to print out where
that hash matches the hash that we have that we are looking for throughout our environment uh one thing to note again this code isn't optimized so what i have as this example here that we are searching the remote c drive this is the remote computer once again because we're using uh powershell remoting we're telling the remote computer to be running these commands this is telling the remote computer to hash everything on the c drive um if you're doing this in a real life real real fire scenario you're going to be you'll want to be a bit more targeted so for example we know this piece of malware they're using the temp folder to try and
obfuscate just to try and hide it away in our file system so instead of searching for the entire c drive at least at this juncture until you get more information you can put in the file path that for every computer i want to get a hash of all of the all of the temp uh folder so just so that it's a bit more optimized a bit more specific so you're not uh so you can get data in a more live scenario and hopefully in the future i can build up this code a bit more so that i can benefit from background jobs or parallel processing next we're going to look at looking up admin user groups on a remote desktop
now while i well most of my work does deal with network security ever every once in a while i'm brought into a project or a exercise where we're trying where we're going over best practices best security practices with the client and just helping them with their overall security hygiene and every once in a while the comment comes up we're we're trying to um doing do an audit of their uh administrators and then the client will just go in and they will uh pull up active directory pull out the user groups and say or their administrator user group and say here are all of our admins but that's not necessarily true if if i'm an attacker and i've gained admin
control of one of your boxes or another potential use case is i've gained admin access i've created myself an admin an admin in your active directory i can go into any of your workstations and i can put in a local administrator account if after that i delete the active directory admin that i used to create that account if you don't have the logging and the monitoring in place to detect that account admin account creation admin account deletion you have no idea that something questionable has been going on meanwhile on each of each of your workstations the uh the attacker now has a local admin account that lookups and active directory won't tell you anything about but they now have
persistence on those machines on those servers um so in this particular example um we are using the invoke command again and we're going to a specific computer and we are using the using script lock we're telling the remote powershell instance to run the get local group member and we are specifying that we want to see all of the members of the group administrators and in the output you see the name the susan administrator so this is the built-in default administrator that's not too suspicious and then we have the traders domain users traders being the active directory domain that i have in this lap environment where they've decided to give all domain users admin admin credentials
on all of their workstations and i have seen this in production in actual client productions and it does make me sad but once again going back to the use case i was giving you all if more people have administrative rights then should have administrative rights and one of those uh one of those accounts gets popped how easy it is then how easy is it then for them to go in and make a local account that you don't necessarily know exists there without something like this or without another tool that is actively monitoring the creation of all local accounts on on a remote workstation on this next screen here you'll notice the giant red error this is because and i believe this is
the third time i've mentioned it and why i've been hinting at it so much we are running these commands using the remote powershell instance get local group member was all was a command that was only introduced in powershell version 5. so if one of your remote workstations is running a powershell version um that is uh older uh than version five then a you should patch it uh whenever you get the cycles to as soon as you can and uh be well we still want this data so in the in the case that you're uh we're acting in an emergency and you're trying to find who has admin access to it you still can't find the information
you just can't use it using a natural powershell commandlet if you're on an older version of powershell in this particular example and i won't go into the lead up so much since we've covered it quite a bit we're using right host for powershell that's essentially just a print to your screen and so we're printing out to the screen just members of the local administrators group on dollar sign using semicolon sorry colon computer the dollar sign using uh you haven't seen this before and that's because and the reason that we're using that is if we just use the variable dollar computer the remote powershell instance would look at its own databases its own variable let's say i don't have
a computer variable so this is erroring out by using by putting dollar sign using in front of the variable we are passing through the variable that is on our local machine to the remote powershell instance which means that it's going to use the dynamic nature of that variable and we don't have to worry about it and this will print out on our screen nicely you the reason we have this line here is so that if we're iterating through a full list to get a full inventory of your environment we can see in the output exactly which computers which devices have which um which which accounts as a member of their administrator we're using the net local
group administrators to actually get us the information that we need here and then the final line here is just uh writing host printing to the screen a new line character just to give us some white space so that when we are iterating through a list of a hundred workstations that we have the bit of white space just for the readability of the outgoing report so this is what it will look like once again members of the local administrators this is being run on the one the administrator the members of the administrators group is administrator domain admins and enterprise admins it's a domain controller that's not that's not unexpected that's kind of expected and once again this time we're searching
for adam instead of susan and once again we see administrators and domain users all everyone is allowed full admin access that's great for everyone for our final use case here that we'll have time for today uh we are going to deploy and use auto runs uh once again auto runs is a part of the system terminal suite and what it does is it looks through um all of all of the places where you can configure a program or an application to start automatically when a device is booted um the use case uh for this is um you'll find that many attackers use something so use something that autoruns can catch in order to maintain persistence on a
device whether it's on on startup of this on this workstation or on the server i want to i want this back door to run automatically or i want this beacon to call back to my command control server so first we're going to have to deploy the auto runs file to each of the devices that we're going to want to [Music] all the devices that we want to run this on i'm going to do that using the copy item and this path here is a shared folder that all of the target devices are able to reach and just for simplicity we're saving this on to the c drive for all of the computers in our target list
you can see the output of that below where it just kind of silently runs in the background and then if we round the door c again as you saw in some of the previous examples you saw this file because i didn't necessarily do these demos in order you'll notice that we had the auto runs deployed to that folder next we're going to need to actually run these commands or run these files so we're going once again to each computer in our target list and we are going to um sorry we are and we are going to run it silently in the background and you'll notice that instead of printing it to the screen i am putting a
i'm piping that output and i'm creating an out file um named autoruns with the computer variable the end goal being that we want a directory that is full of uh full with an autoruns file that is unique for each of those devices that we are running auto runs on so here's how the folder that i was running this in looks i killed it a bit early but you can see we have an autoruns file for the dc1 and we have the autoruns file for adam now what can we do with this firstly when we're doing our first run of this we have um we have a list of let's say 50 workstations and all of them have the
same size of an autoruns file of 736 kilobytes here let's say one of those 50 has a larger file now there are a couple different use cases for potential reasons for that is maybe an administrator or an engineer needed a specific folder they went to it sorry not a specific alert they needed a specific application to do their work they went to it they got this application approved they have it installed and then it goes in and then you have your sorry excuse me
sorry about that so you so you go in you've got you got your approval you've installed this application you can see that you can you can go in and you can verify yes this is authorized on the other hand if you see one server or one workstation has a different sized other ones file what well we've gone in and we verified that these workstations should be the same is this shadow i.t where that engineer installed something that we doesn't have it approval or is it that engineer's box got popped and then someone put in um someone put in a persistence method that autoruns autoruns has caught this allows us to find that very simply using just these tools
earlier when i was talking a bit about threat hunting and how i also think that the end goal of this should all be automation whether we uh when whether we find something or we don't find something so in the example we've done we've done this report we have our list of auto runs for 50 workstations all the exact same it's beautiful in its symmetry if we run another script um and we and we and if we run this script if we're sorry if we create a script and say i want to run auto runs every week every sunday perfect and then if we have another script that is monitoring that if after we've been doing this for 10
weeks and none of these autoruns files have have changed and all of a sudden mr engineer's file changes and he's once again the only one automatically it comes back and uh automatically we go back and we say well why did this change we go through that once again was this a change that was authorized is this a shadow i.t where the engineer just installed something or once again was that workstation caught or popped and then by having the having these scripts and this analysis running in the background and configured to email or alert our security team or our sock or our our support desk if we if we configure that script to automate to automatically
tell us that there has been a change in between these in between these instances we've caught we've caught we've potentially caught a uh a breach automatically without any more effort on our end on our side here all right we actually went much faster than i thought we were going to go um so we have this is just the output of one of those files just so that i'm not making random stuff up yes this auto runs is returning as we as we are going and then the next slide here is questions uh one a couple of things just before we do start any with any questions one thing i believe i forgot for this example um
i did want to highlight and i forgot when i was going through i apologize but you'll notice that i don't have the dollar computers dot name like i did in all of the other ones and i did want to do this as well because if you remember uh we for the computers.name that was uh that was a folder that was a csv file that was specifically had the name as a field header if you have your own list that is purely the file names you already have the header omitted you don't need the dot name you can just use the dollar computers and then prime it in the exact same way so i did want
to make sure and uh highlight that and then jumping back to questions here before we get into questions i as i said we did have a couple of takeout boxes of some more code examples that we don't have time to do a full presentation on so we do have a whole bunch of references and then here's the credentials thing that i was mentioning earlier where since this is a lab environment just for ease of use i have a bit more permissions that you will probably have in your own environments so you can use these slides here to show you what you need to get your credentials working which is built into powershell to make sure this is all running securely
so i'm just going to run through these slides pretty quick so that it's safe for the youtube recording and then if you guys if any of you want the um if any of you want the slides to have the the code on hand you can reach out and i'll get the slide decks to you
all right so on that note i think we have about five minutes which beat all of my practice runs so are there any questions and where's my mouse here i i don't know like you guys have to throw more puns in it on my tests on my test runs but uh there aren't there aren't many more that can fit in half naturally here yeah newman definitely if you um i had like i said i had my email on the first slide here so you can email me and i can get that to you or in there's some kind of uh direct messaging thingy if you drop me your email i'll get that sent out to you
so for dan hoyne all right i apologize down i probably butchered your last name there the invoke commander running as admin or system provisioning so in the uh so in my lab environment i was using um an admin account uh that has a administrative rights directly to each of the workstations and that's why i had the and let me click back into powershell and that's why i had the um i'm going the wrong direction that's why i had the credentials sections here this walks through the steps of how you are going to access um so powershell is essentially built um from the ground up with as much security as possible so the only reason that these earlier
the earlier commands were going without credentials is because it knew that i was running an administrative account that i already have the remote privileges to access that device if i'm running the powershell on a non-privileged account in order to reach out to a in order to reach out to any of these remote powershell instances i need to put in credentials of an account that does have the right administrative privileges on that device and some of that setup is covered in the in the enabling ps remoting section um those links that i i had provided and then once again i have the slides here of just the different ways that you can use credentials whether you're just
doing a one-off command so using your credentials ad hoc or if you're sitting down for a couple hours you can save your credentials into a variable where it's saved as a secure string here and it can so you can use your credentials without having to type it in manually for the life of that powershell session all right so i'm not seeing anything so hopefully for you guys that was much smoother than it felt for me as a as a first time here but thank you very much for attending and i look forward to meeting and chatting with you guys in the future
Related talks
 49:18
49:18 36:16
36:16 50:09
50:09 50:04
50:04 58:55
58:55 1:29:20